LG KE970 Shine User Manual
User guide
Hide thumbs
Also See for KE970 Shine:
- User manual (289 pages) ,
- Service manual (160 pages) ,
- Instructions (3 pages)

Related Manuals for LG KE970 Shine


Summary of Contents for LG KE970 Shine
- Page 1 ENGLISH Some of contents in this manual may differ from your phone depending on the software of the phone or your service provider. P/N : MMBB0235815 ( 1.0 ) www.lgmobile.com...
- Page 2 K E 9 7 0 U s e r G u i d e - English...
-
Page 3: Table Of Contents
Contents Introduction General functions Browser For your safety Home Making a Call Bookmarks Guidelines for safe Answering a Call and efficient use 7 Go to URL Entering Text History KE970 features 12 Settings Parts of the phone Selecting functions Network profiles Display information 16 and options Cache... - Page 4 Call history Sent Contacts Listen to voicemail All calls Search Info message Missed calls New contact Read Dialled calls Speed dials Topics Received calls Groups Templates Call duration Copy all Text Call costs Delete all Multimedia Data information Settings Settings Information Text message Messaging...
- Page 5 Contents Tools Auto update Auto redial Languages Send DTMF Lost Mobile Track Display Security (LMT) Wallpaper PIN code request Set LMT Backlight timer Phone lock Change password Brightness Call barring LMT Settings Home screen shortcut Fixed dial number Alarm clock Menu style Change codes Calendar...
-
Page 6: Introduction
Introduction Congratulations on your purchase of the advanced and compact KE970 mobile phone, designed to operate with the latest digital mobile communication technology. This user’s guide contains important information on the use and operation of this phone. Please read all the information carefully for optimal performance and to prevent any damage to or misuse of the phone. -
Page 7: For Your Safety
For your safety Warning! Caution! • Mobile Phones must be switched • Switch off the phone in any area off at all times in aircrafts. where required by special regulations. For example, do not use • Do not hold the phone in your hand your phone in hospitals or it may while driving. -
Page 8: Guidelines For Safe And Efficient Use
Further detailed While there may be differences information is given in this manual. between the SAR levels of various LG phone models, they are all designed to meet the relevant guidelines for exposure to radio waves. - Page 9 Guidelines for safe and efficient use Product care and Do not subject this unit to mechanical vibration or shock. maintenance The coating of the phone may be Warning! damaged if covered with wrap or vinyl Only use batteries, chargers and accessories approved wrapper.
-
Page 10: Electronic Devices
Please remove the data cable before Do not use a hand-held phone while powering on the handset. driving. Give full attention to driving. Use a hands-free kit, if available. Electronic devices Pull off the road and park before making or answering a call if driving conditions All mobile phones may get interference, so require. -
Page 11: Blasting Area
Guidelines for safe and efficient use Avoid damage to your Do not transport or store flammable gas, liquid, or explosives in the compartment hearing of your vehicle, which contains your mobile phone and accessories. Damage to your hearing can occur if you are exposed to loud sound for long periods of time. -
Page 12: Battery Information And
Use only LG batteries and chargers. LG Risk of explosion if battery is replaced chargers are designed to maximize the by an incorrect type. battery life. -
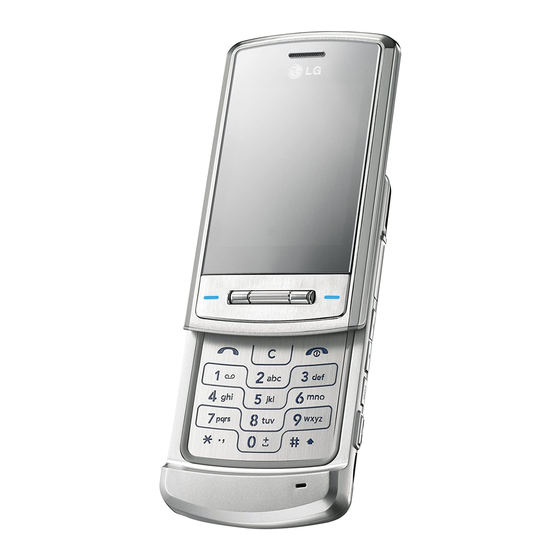
Page 13: Ke970 Features
KE970 features Parts of the phone Front view Top: Signal strength, Earpiece battery level and various Navigation key function In standby mode: Bottom: Soft key Briefly : List of Message indications Briefly : List of Profiles Briefly press: Menu Briefly press: List of Alpha numeric keys Contacts In standby mode: Input... - Page 14 Left soft key/ Right soft key These keys perform the function indicated in the bottom of the display. End key Switch on/off (hold down) End or reject a call. Clear key Deletes a character with each press. Hold the key down to clear all input. Use this key to go back to a previous screen.
- Page 15 KE970 features Holes for a Battery Charging Connector/ Carrying strap Cable connector and Ear jack Note Please ensure phone is powered on in idle mode before connecting the USB cable. Side keys In standby mode (opened): Volume of key tone In standby mode (closed): Short press - The LCD light on.
- Page 16 Rear view SIM Card Socket Battery latch Press this button to remove Memory card slot the battery cover. Battery cover Flash Camera lens Battery Terminals Battery...
-
Page 17: Display Information
KE970 features Display Information The screen displays several icons. These are described below. Icon area On-Screen Icons Text and graphic area Icon Description Tells you the strength of the Soft key network signal.* Menu Contacts indications Area Description * The quality of the conversation may change depending on network Displays various icons. - Page 18 Icon Description Icon Description Call is connected. Diverted call. You can use GPRS service. Indicates that the phone is accessing WAP. Shows that you are using a roaming service. Indicates that you are using GPRS. The alarm has been set and is on. You have activated the Bluetooth menu.
-
Page 19: Installation
Installation Installing the SIM card Note and the handset battery Removing the battery from the phone when the power is on may Make sure the power is off before you cause the phone to malfunction. remove the SIM card or battery. 1. - Page 20 3. Install the battery. Note Insert the battery into the battery The metal contact of the SIM card compartment as metal contacts meet in can be easily damaged by the middle of the phone. scratches. Pay special attention to Push down the top of the battery until it the SIM card while handling.
-
Page 21: Charging The Battery
Installation Charging the Battery CAUTION! • If the battery is completely Before connecting the travel adapter to the discharged, the charging display phone you must first install the battery. will appear on the LCD approximately 1 to 1.5 minutes after connecting TA. -
Page 22: Disconnecting The Charger
Disconnecting the WARNING! charger • Unplug the charger during lightning storms to avoid electric shock or fire. Disconnect the charger from the phone by pulling the connector, not the cord. • Make sure that no sharp-edged items, such as animal teeth or nails, come into contact with the battery. -
Page 23: Inserting The Memory Card
Installation Inserting the memory card Removing the memory card Insert the memory card into the slot until the memory card is fully inserted into the Carefully remove the memory card out of slot, as shown in the figure below: the socket, as shown in the figure below: Note Note The gold connectors must be face... -
Page 24: General Functions 6
General functions Making a Call Making International Calls 1. Press and hold the key for the 1. Make sure your phone is powered on. international prefix. The ‘+’ character 2. Enter a phone number including the area can be replaced with the international code. -
Page 25: Answering A Call
General functions Adjusting the Volume 2. End the call by closing the phone or pressing the key. During a call, if you want to adjust the earpiece volume, use the side keys of the phone. Note In idle mode, you can adjust the key You can answer a call while using volume using the side keys. -
Page 26: Entering Text
Entering Text T9 Mode This mode allows you to enter words with You can enter alphanumeric characters by only one keystroke per letter. Each key on using the phone’s keypad. For example, the keypad has more than one letter. The storing names in the Address Book, writing T9 mode automatically compares your a message, creating scheduling events in... - Page 27 General functions Symbolic Mode Note This mode allows you to enter special You can select a different T9 characters. language from the menu option or press hold down the key . The Changing the Text Input Mode default setting for T9 is set to 1.
- Page 28 If the desired word is missing from the Using the ABC Mode word choices list, add it by using the Use the keys to enter your ABC mode. text. 2. Enter the whole word before editing or 1. Press the key labeled with the required deleting any key strokes.
-
Page 29: Using The Symbol Mode
General functions Using the 123 (Numbers) Mode Note The 123 Mode enables you to enter Refer to the table below for more numbers in a text message (a telephone information on the characters number, for example). available using the keys. Press the keys corresponding to the required digits before manually switching Characters in the order display... -
Page 30: Selecting Functions And Options
Selecting functions and options Your phone offers a set of functions that allow you to customise the phone. These functions are arranged in menus and sub- Menu Contacts menus, accessed via the two soft key smarked . Each menu and sub-menu allows you to view and alter the settings of a particular function. -
Page 31: In-Call Menu
In-call menu Your phone provides a number of control Answering an Incoming Call functions that you can use during a call. To To answer an incoming call when the access these functions during a call, press handset is ringing, simply press the the left soft key [Options]. -
Page 32: Muting The Microphone
Muting the Microphone Conference Calls You can mute the microphone during a call The conference service provides you with by pressing the [Mute] key. The handset the ability to have a simultaneous can be unmuted by pressing the [Unmute]. conversation with more than one caller, if When the handset is muted, the caller your network service provider supports this cannot hear you, but you can still hear... - Page 33 In-call menu Making a Second Call Activate the Conference Call on Hold You can make a second call while currently on a call. Enter the second To activate a conference call on hold, number and press the press the key. Alternatively press the left soft key [Options] and select Join When the second call is connected, the all/Hold all calls.
- Page 34 Private Call in a Conference Call To have a private call with one caller from a conference call, display the number of the caller you wish to talk to on the screen, then press the left soft key. Select the Private menu of Conference call to put all the other callers on hold.
-
Page 35: Menu Tree
Menu Tree The menu in this phone can be displayed in 2 ways. One is by list type or secondly in grid format. Please note that menu number options are different in each view. The default setting on the phone is set to show the menu in list type, so therefore all the menu number selections throughout the manual are shown according to that setting. - Page 36 4. Call history 5. Messaging 6. Contacts 6.1 Search 4.1 All calls 5.1 New message 6.2 New contact 4.2 Missed calls 5.2 Inbox 6.3 Speed dials 4.3 Dialled calls 5.3 Email box 6.4 Groups 4.4 Received calls 5.4 Drafts 6.5 Copy all 4.5 Call duration 5.5 Outbox 6.6 Delete all...
- Page 37 Menu Tree 7. My stuff 8. Tools 9. Settings 7.1 Images 9.1 Date & Time 8.1 Lost Mobile Track 7.2 Sounds 8.2 Alarm clock 9.2 Languages 7.3 Videos 8.3 Calendar 9.3 Display 8.4 Calculator 7.4 Documents 9.4 Connectivity 8.5 Memo 7.5 Others 9.5 Call 8.6 Stop watch...
-
Page 38: Profiles
Profiles In Profiles, you can adjust and customise The profile setting option opens. Set the the phone tones for different events, option as required. environments, or caller groups. Call alert type: Set the alert type for There are five preset profiles: General, incoming calls. - Page 39 Profiles Power on/off volume: Set the volume of the ringing tone when switching the phone on/off. Auto answer: This function will be activated only when your phone is connected to the handsfree kit. • Off: The phone will not answer automatically.
-
Page 40: Browser
Browser You can access various WAP (Wireless Description Application Protocol) services such as Scrolls each line of the banking, news, weather reports and flight content area information. These services are specially designed for mobile phones and they are Returns to the previous maintained by WAP service providers. -
Page 41: Home
Browser Home Connect: Connects to the selected Menu 2.1 bookmark. Connects to a homepage. The homepage View: You can see the selected will be the site which is defined in the bookmark. activated profile. It will be defined by the Edit: You can edit the URL and/or the service provider if you have not defined it title of the selected bookmark. -
Page 42: History
History Each profile has submenus as follows: Menu 2.4 Activate: Activates the selected profile. This menu will shows the recent browsing View: You can see the selected profile. pages. Edit: You can edit the selected profile. New profile: You can add a new Settings profile. -
Page 43: Cookies
Browser Information Menu 2.6 Note You can view the information of WAP A cache is a buffer memory, which browser version. is used to save data temporarily. Cookies (Menu 2.5.3) Check whether a cookie is used or not. Security certificates (Menu 2.5.4) You can see the list of personal. -
Page 44: Multimedia
Multimedia You can enjoy various multimedia Note functions on your phone such as camera, voice recorder, MP3 for your fun and Because of the small dimension of convinience. the speaker, in some cases the audio could be distorted, especially at maximum volume Note and when there are lots of bass When the status of the battery... - Page 45 Multimedia Note Note KE970 doesn’t support the You should copy MP3 to variable bit rate of all mentioned Sounds/MP3 folder. If you copy to file types. Therefore, you can’t another folder, you will not be change the file from MP3 format able to view the MP3 files.
- Page 46 Note Equalizer In case that any invalid file is included in the playlist, an error File name message will pop and go back to Progressive the prior screen. Running time Stereo/ Playmode/ Volume 1. Press Multimedia menu, and then select Shuffle level Options...
- Page 47 Multimedia Settings Note - Equalizer: This menu helps you to Music is copyright protected in adjust to a variety of environments international treaties and national when listening to music. copyright laws. It may be - Play mode: This menu allows to set necessary to obtain permission or the play mode: Repeat one, Repeat a license to reproduce or copy...
-
Page 48: Camera
Camera Zoom in/Zoom out Menu 3.2 Camera Using the camera module built in your phone, you can take pictures or record Shutter sound or video recording sound is videos. Additionally, you can send photos omitted even when setting mode, to other people and select photos as including manner mode wallpaper. - Page 49 Multimedia - Auto Focus function is enabled when Quality [ ]: Allows you to set the taking a picture or sticker shot. Press the image quality from Normal, Fine and camera button half way to adjust Super fine. focus. Flash [ ]: Allow you to set the flash 1.
-
Page 50: Video Camera
Video camera White balance [ ]: Allows you to Menu 3.3 change the settings according to the 1. Select Video camera menu. environment. (Night mode/Fluorescent/ 2. Video camera settings menu is the same Cloudy/Incandescent/Daylight/Auto) with Photo camera settings, except Shutter tone [ ]: You can set the following items: sound when taking a picture. -
Page 51: Voice Recorder
Multimedia Voice recorder Album Menu 3.4 You can view the Sounds folder which lists You can record voice memo. The following all sound files saved in the memory. [Options] menus are available. Storage Note You can choose Phone or External If you are recording voice with memory. -
Page 52: Call History
Call history You can check the record of missed, Enter a new name for the number and received, and dialled calls only if the save both in the Address Book network supports the Calling Line Send a message by this number Identification (CLI) within the service area. -
Page 53: Received Calls 52 Topics
Call history Received calls Call duration Menu 4.4 Menu 4.5 This option lets you view the last 50 Allows you to view the duration of your incoming calls. You can also: incoming and outgoing calls. You can also reset the call times. View the number if available and call it or save it in the Address Book The following timers are available:... -
Page 54: Data Information Multimedia
Call costs Menu 4.6 Allows you to check the cost of your last call, all calls, remaining and reset the cost. To reset the cost, you need to PIN2 code. Data information Menu 4.7 You can check the amount of data transferred over the network through the GPRS information option. -
Page 55: Messaging
Messaging New message 3. You can add phone numbers in the Menu 5.1 address book. This menu includes functions related to 4. Press the [Option] and then press SMS (Short Message Service), MMS send after entering numbers. (Multimedia Message Service), Email, Insert voice mail, as well as the network’s service messages. -
Page 56: Multimedia
- Contacts: You can add phone Multimedia (Menu 5.1.2) numbers or e-mail addresses in You can write and edit multimedia address book. messages, checking message size. - My business card: You can add your 1. Enter the New message menu by Business card to the message. - Page 57 Messaging New T9 word: Select the New T9 Note word for inputting New word into the dictionary. All messages will be automatically saved in the outbox folder, even Exit: You can get back to the Message after a sending failure. menu.
-
Page 58: Email
Email Save to drafts: Select this to save the (Menu 5.1.3) message in Drafts. To send/receive an email, you should set up the email account. Edit subject: You can edit the subject. 1. You can input up to 20 email addresses T9 languages: Select the language for in the To and Cc field. -
Page 59: Inbox
Messaging Inbox Menu 5.2 Note You will be alerted when you have For each e-mail account you may received messages. They will be stored in save up to 40 messages (totally Inbox. 200 for five accounts). In Inbox folder you may save not more than If the phone shows ‘No space for SIM 20 messages, in Drafts and message’, you have to delete only SIM... -
Page 60: Email Box
Delete: You can delete the current Email box Menu 5.3 message. When you access this menu, you can Reply: You can reply to the sender. either connect to your remote mailbox to Reply to all: You can reply to all of the retrieve your new email messages, or you sender. -
Page 61: Drafts
Messaging Drafts Outbox Menu 5.4 Menu 5.5 Using this menu, you can preset This menu allows to view the message multimedia messages that you use most which is about to send or is failed sending. frequently. This menu shows the preset After sending the message successfully, multimedia message list. -
Page 62: Call History 51 Sent
Sent Info message Menu 5.6 Menu 5.8 (Dependent to network and This menu allows you to view the messages which are already sent. You can subscription) check the time and the contents of Info service messages are text messages message. delivered by the network to GSM. -
Page 63: Dialled Calls Read
Messaging Read Templates (Menu 5.8.1) Menu 5.9 1. When you have received an info service message and select Read to view the Text (Menu 5.9.1) message, it will be displayed on the You have 6 text templates as below; screen. You can read another message by scrolling [Next]. - Page 64 Insert: You can add Symbol, Image, Send via Video, Sound, New slide, Text template, - Text message: Use this to send the Contact, Business card and Others. selected template message by SMS. Preview: You can preview multimedia - Multimedia message: Use this to templates you wrote.
-
Page 65: Settings 64 Information
Messaging Settings Message centre number: If you want Menu 5.0 to send the text message, you can receive the address of SMS centre Text message (Menu 5.0.1) through this menu. Message types: Bearer setting: You can set the bearer Text, Voice, Fax, Paging, X.400, setting such as GSM, GPRS. -
Page 66: Email
Read report: You can receive the report Email (Menu 5.0.3) whether the receiver read the message Email account or not. This menu allows you to edit, delete or Auto download: If you select On, you add an email account. receive multimedia messages •... - Page 67 Messaging Outgoing mail server: Enter the Outgoing mail authentication: SMTP address and Port number of when you send the mail, you can set computer that sends your email. authentication whether or not. - Advanced settings Outgoing server ID/password: Enter the ID and password for sending Protocol type: Choose your protocol your email.
-
Page 68: Voicemail Number
Voicemail number Info message (Menu 5.0.4) (Menu 5.0.6) You can receive the voicemail if your Receive network service provider supports this Yes: If you select this menu, your phone feature. When a new voicemail is arrived, will receive Info service messages. the symbol will be displayed on the screen. -
Page 69: Contacts
Contacts Search New message: After you have found Menu 6.1 the number you want, you can send a 1. Select Search by press the left soft key message(Text/Multimedia/Email) to the [OK]. selected number. 2. Enter the name that you want to search. Send via: You can send the data of phone book via Text message, Multimedia message, Bluetooth or... -
Page 70: New Contact
New contact Speed dials Menu 6.2 Menu 6.3 You can add phonebook entry by using this You can assign any of the keys function. Phone memory capacity is 1000 with a Name list entry. You can call entries. SIM card memory capacity directly by pressing this key. -
Page 71: Groups
Contacts Groups Copy all Menu 6.4 Menu 6.5 You can list up to the members per each You can copy entries from SIM card group. There are 7 groups you can make memory to Phone memory and vice versa. lists to. SIM to phone: You can copy the entry View members: Shows the group from SIM Card to Phone memory. -
Page 72: Settings
Settings Information Menu 6.7 Menu 6.8 1. Press the right soft [Contacts] in Service dial numbers standby mode. Use this function to access a particular 2. Scroll to Settings, then press the left list of services provided by your network soft key [OK]. -
Page 73: My Stuff
My stuff Images File Menu 7.1 - Rename: Change the file name of Show the list of JPG files at My selected file. You can not change the media\Photos in Multimedia memory. extension of file. View: You can see the JPG file when pressing OK key or selecting View menu Note of Option menus. -
Page 74: Sounds
Sounds Warning! Menu 7.2 If you remove the external memory Show the list of MP3, MP4, AAC, M4A during data transfer, it can seriously files at My media\Music in Multimedia damage the phone. memory. - Information: Show the file Play: You can play the MP3 file when information. -
Page 75: Videos
My stuff Videos Menu 7.3 Note Shows the list of 3GP, 3G2 files at My You may send files via BT only if media\Videos in Multimedia memory. they are stored in Phone Supported file types are 3gp files, that are memory,not from memory card.To encoded with MPEG4 and h.263 video- send files from external memory... -
Page 76: Documents
New folder: You can create a new Warning! folder. You can’t use the following characters \ / : * ? “ < > | Multi delete: You can remove a number of files you have selected. - Move to folder: Move the selected Delete all: Delete all the files in the file to the folder. -
Page 77: Others
My stuff Others Menu 7.5 Note Show the list of files in My media\Others When you connect the phone with in the Multimedia memory. a PC via Bluetooth, you can both send and receive files to the Note Music and Video folders. You can copy any file type to the Others. -
Page 78: Games & Apps
Games & Apps Menu 7.6 New Fantastic LG In this menu, you can manage the Java The KE970 works as a mass storage applications installed in your phone. You device. If you connect the USB cable, can play or delete downloaded you can use the phone as a applications, or set the connect option. - Page 79 My stuff When you copy a file to the removable disk, you can see a message on the display “transferring”. It means MASS STORAGE is working and data is being transferred. While “transferring”, do not disconnect the cable. If you disconnect the cable while “transferring”, data will be lost or corrupted and possibly damage the phone.
-
Page 80: Tools
Tools Lost Mobile Track (LMT) Change password (Menu 8.1.2) 1. A List of tools is displayed. Menu 8.1 2. Select Lost Mobile track The LMT feature of this phone provides 3. Select CHANGE PASSWORD you with the ability to have a tracking system in place for your mobile in case you 4. - Page 81 Tools When you enter menu “lost mobile Track”, How to use :Lost Mobile Track a LMT code dialogue will be displayed, 1.Go to tools menu. which needs an authenticate code to enter 2. Select Lost Mobile track inside the LMT options. 3.
-
Page 82: Alarm Clock
Alarm clock Calendar Menu 8.2 Menu 8.3 You can set the alarm clock to go off at a When you enter this menu a calendar will specified time. show up. On top of the screen there are sections for date. Whenever you change 1. - Page 83 Tools In the scheduler mode, press left soft key You enter the appropriate information in [Options] as follows; the follow section; Time, Repeat and Alarm. View Scheduler tone View all schedules and memo for the chosen day. You can set the alarm tone of each chosen date.
- Page 84 Schedule SMS (SSMS) New schedule The SSMS feature of this phone provides Allows you to add new schedule and you with the ability to send the Schedule memo for the chosen day. You can store SMS by Scheduled time and date. The up to 100 notes.
-
Page 85: Memo
Tools 2. Select Right soft Navigation key to 5. To input the decimal number, press Switch ON/OFF SSMS key. 3. Enter Date, time, phone number and 6. To end Calculator, press the right soft message. [Back]. 4.Select Left Soft Key or OK key to Save. Memo Menu 8.5 Calculator... -
Page 86: Stop Watch
Stop watch World clock Menu 8.6 Menu 8.8 1. Press [Start] to take time and record the You can check the current time of lap time by pressing [Lap]. Greenwich Mean Time (GMT) and major cities around the world, using the left/right 2. -
Page 87: Sim Services
Tools SIM services Menu 8.9 This menu depends on SIM and the network services. -
Page 88: Settings
Settings Date & Time Auto update (Menu 9.1.5) Menu 9.1 Select On, the phone will automatically You can set functions relating to the date update the data and time. and time. Set date (Menu 9.1.1) Languages You can enter the current date. Menu 9.2 You can change the language for the Date format... -
Page 89: Brightness
Settings Brightness Standby text (Menu 9.3.3) (Menu 9.3.7) You can set the brightness of LCD: 100%, If you select On, you can edit the text 80%, 60%, 40% which is displayed in standby mode. Home screen shortcut Network name (Menu 9.3.4) (Menu 9.3.8) Selecting On displays the functionalities of If this function is activated, network name... - Page 90 Bluetooth on/off Note You can activate or cancel the Bluetooth If you use LG PC Sync via function. Bluetooth, you can exchange the Device list data only within phonebook You can view all devices which your When you receive data from KE970 is already paired to.
- Page 91 Settings - Add new: Allows to search new - Set as authorised/Set as Bluetooth devices and add them to unauthorised: Allows you to set an your phone’s list of paired devices. authorised connection between each When you select Add new your Bluetooth device.
-
Page 92: Network
Manual: The phone will find the list of Bluetooth device. The default name is available networks and show you them. LG KE970. Then you can select the network which you want to use if this network has a - My address: You can view the roaming agreement with your home address of your Bluetooth device. - Page 93 Settings GPRS attach Network profile (Menu 9.4.2.2) (Menu 9.4.2.3) You can set GPRS attach service. Data connections Power on • Name: You can type the network name. If you select this menu, the phone is automatically registered to a GPRS •...
-
Page 94: Usb Connection
- Call speed: The speed of your data - Primary server: Input the IP address connection; 9600 or 14400 (Depends of the primary DNS server you on Operator) access. - Linger time: You need to enter - Secondary server: Input the IP timeout period. -
Page 95: Call
Settings 2. Select USB Mass Storage Device, click If busy on Stop. Diverts voice calls when the phone is in The following message will appear: use. “The ‘USB Mass Storage Device’ device If no reply can now be safely removed from the system”... -
Page 96: Answer Mode
The submenus Answer mode (Menu 9.5.2) Call divert menus have the submenus Slide open shown below. If you select this menu, you can receive - Activate an incoming call when you open the slide. Activate the corresponding service. Any key To voice mailbox If you select this menu, you can receive Forwards to message centre. -
Page 97: Call Waiting
Settings Minute minder (Menu 9.5.5) You can send your phone number to If you select On, you can check the call another party. duration by a beep sound given every Your phone number will be shown on minute during a call. the receiver’s phone. -
Page 98: Security
Security 5. You can enter your PUK code up to 10 Menu 9.6 times. If you put wrong PUK code more than 10 times, you can not unlock your PIN code request (Menu 9.6.1) phone. You will need to contact your In this menu, you can set the phone to ask service provider. -
Page 99: Call Barring
Settings Call barring Cancel all barrings (Menu 9.6.3) The Call barring service prevents your You can cancel all barring services. phone from making or receiving certain Change password category of calls. This function requires the You can change the password for Call call barring password. -
Page 100: Fixed Dial Number
Fixed dial number Change codes (Menu 9.6.4) (Menu 9.6.5) (SIM dependent) PIN is an abbreviation of Personal Identification Number to prevent use by You can restrict your outgoing calls to unauthorized person. selected phone numbers. The numbers are protected by your PIN2 code. You can change the access codes: Security code, PIN1 code, PIN2 code. -
Page 101: Flight Mode
Settings Flight mode Power saving Menu 9.7 Menu 9.8 This allows you to use only the phone’s If you set On, you can save the power features that do not require the use of the when you don’t use the phone. wireless network when you are in an airplane or in places where the wireless network is prevented. -
Page 102: Q&A
Q&A Please check to see if any problem which Connection is poor even when you may have with your phone is described established. here before taking it for service or calling a In certain areas, signal strength can service engineer. vary dramatically. - Page 103 Q&A The phone gets warm. Usage time of battery becomes shorter. During long calls, or if games/Internet are used for a long time, the phone If the battery time is short, it may be may become hot. This is perfectly due to the user environment, or large normal and has no effect upon the life volume of calls, or weak signals.
- Page 104 I cannot find the lock, PIN, or PUK code, or password? The default lock code is ‘0000’. If you forget or lose the lock code, contact your phone dealer. If you forget or lose a PIN or PUK code, or if you have not received such a code, contact your network service provider.
-
Page 105: Accessories
# Variation in operation times may occur microphone depending on SIM card, network condition ,usage style,usage setting and environments. Note Travel Adapter Always use genuine LG accessories. This charger allows you to charge the Failure to do this may invalidate battery while away your warranty. -
Page 106: Technical Data
Technical data General Product name: KE970 System: GSM 900 / DCS 1800 / PCS 1900 Ambient Temperatures Max: +55°C Min: -10°C...