

Introduction: How to Build Real Fully-Functional Jump Stilts From Scratch!


I'd like to start this Instructable by saying that this project was a blast to build! From start to finish, it was a very low effort but high reward adventure! The working ideas are simple, the parts are readily available, and the stilts required very little actual work to complete. I imagine that if you worked at a steady pace, it could easily be done in a single weekend. The commercially available ones are definitely better than what I can make out of scrap right now, but these are definitely nothing to shake a stick at! I would encourage you to explore the idea of building a set yourself.
Jump stilts are kind of a fun thing. If you aren't familiar with them then I will introduce you to an awesome and underrated piece of hardware!
Jump stilts are a piece of footwear designed to accentuate a users ground movement capabilities. Imagine a trampoline the exists underneath you at all times. They contain large springs that run from the users upper leg down to the ground. When the user exerts a force on the ground some of the energy is stored in the spring and gets released on the rebound. It's really a very simple concept. Naturally a vehicle leaf spring fits this role quite well, even down to the shape it takes. The only drawback is the weight. I'll cover more of that technical stuff a little bit later though.
This project was born from two things. The first thing, being the lack of information available on these things. I had a hard time believing that nobody else had attempted to build an accurate set of jump stilts, but when I searched the internet, I couldn't find anything that was actually close to the real deal. Some had built some using the same leaf spring concept, but none were actually functional as jump stilts are intended to be. I saw an opportunity to fill a gap and try something new so I could open up the idea to others.
The second reason? I've wanted a set since I was little, but I'm too cheap to spend $235 on a set of real Skyrunners... XD
So that's the reasoning. Now for the execution!
Supplies
I have a relatively small selection of equipment and I had more than enough to throw these together. Most hobby metalworkers are equipped with the tools necessary, and I'm sure that its absolutely possible to build these without the use of the most uncommon tool, the welder, if you could afford the time to use fasteners and design different attachment methods instead.
The list of tools I used were as follows:
-110v arc welder
-angle grinder
-drill press (or a hand drill would work if that's all you have)
-a bench vise (optional but extremely helpful)
-Asst. hand tools (hammer, tape measure, wrenches. etc...)
Next is a list of the exact materials I used. All of the solid building materials are steel.
-a leaf spring from a 1992 Dodge Dakota
-1" x 1" x 1/8" square tubing
-1" x 1/8" flat bar
-1" x 2" rectangular tubing
-1 1/2" x 1/8" flat bar
-1/2" x 1/2" x 1/8" square tubing
-3/8" threaded rod
-1 1/2" x 1 1/2" by 1/8" square tubing
-2" x 1/8" flat bar
-some random bits from an old truck frame (read on to see what I mean here)
-1 1/2" wide polyester webbing
-4, 1 1/2" metal adjustable sliding buckles
-12 standard 3/8" hex nuts
-12, 3/8" nylock nuts
-8, 1 1/4" long 3/8" bolts
-4, 2 1/4" long 3/8" bolts
-2. 2" long 1/2" clevis pins
-JB Weld (or other suitable epoxy)
-Gorilla Glue (optional)
-electrical tape
-20" of 1/2" pipe insulation
-12, 1/2" long 1/8" pop-rivets (optional)
-4 trampoline springs (optional)
-a junk bike tire
I think that's everything! I know it's quite a lot, but I wanted to be specific. Luckily I had everything on hand except for all of the correct fasteners and some of the webbing, so my total cost was less than $20. These are the things in my exact pair, but I would encourage you to work as much as you can with whatever you have on hand! Ingenuity is key!
Step 1: The Idea

I started by drawing up a sketch to help me visualize my goal product. You'll notice that the drawing looks nothing like my end result, but it was helpful in realizing the mechanics. There really isn't much to these, so the idea is very straight forward. It can be broken up into just a few major functioning pieces and I'll explain them one by one.
As I previously mentioned, the spring is the most important part of this and are what makes these stilts work. I decided that my most readily available contender for this was a simple vehicle leaf spring. Next, we need a means of attaching it to ourselves.
The spring is attached to the leg frame around the upper calf area of the user. The user is standing with each foot in a metal frame that has three points of contact to remain securely fixed. One strap around the toe to retain pitch control of the stilts, one strap around the ankle to keep the users heal firmly planted in the frames corner, and one more solid metal retaining bar above the spring to keep the upper leg firmly in place.
After that, we need a way to control the spring still. It needs to be able to flex along the entirety of itself still though, so there is a control arm attached at the base of the foot and part way up the spring itself.
That's basically it! See? There is so little to them! There is a lot of room for flexibility in design as well as long as everything can move as it is supposed to and everything is strong enough.
So, we have a main enemy in the building process here... Weight. It's probably the second most important concern behind strength. The jump stilts out on the market are made of aluminum and plastic with springs made of either carbon fiber or fiberglass. They're lightweight and maneuverable. I couldn't find the stats for these anywhere online, so I checked the product page for these on Amazon, and the shipping weight is about 20 pounds so it's safe to assume that they weigh about 10 pounds each. I set that as my goal for this project at the very beginning.
When designing your pair, consider using the least amount of material that's still safe. Using aluminum is ideal but this is operating on the assumption that we only have steel to work with. Good news though! Aluminum is 3 times lighter than steel, BUT steel is three times stronger than aluminum! (according to what I read online so don't quote me on that) So it would be nice to assume that we can theoretically use 1/3 of the respective amount of steel and approximately have the same results. That's what I did anyway and it did seem to work in the end.
So these were some of my thoughts going into this project. I hope this can help you!
Step 2: Springs


Okay, here we go!
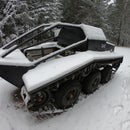
I'll start off with the springs. I used some from the leftover chunk of truck frame that I had lying around from building my homemade tank. Link here.
Every spring pack that I know of has a top spring that has eyelets in both ends to act as rotating attachment points to the frame. These are going to be what we'll use to attach our springs to our leg frames. That way we don't have to drill any unnecessary holes or weld to the spring steel. The heat from welding could ruin the temper and render it too soft to use.
One whole spring is too much weight and too resistant for use on our stilts so I cut the spring in half and used a half for each side. Cutting spring steel is tedious and slow, so be prepared with at least two cutting wheels and some water to cool the metal. I'm not sure if I could generate enough heat with my grinder to effect the temper of the steel, but I stayed on the safe side and made sure to keep the metal nice and cool by pouring some water on it every so often. Please wear proper safety equipment when doing any metal cutting. Especially this amount. The dust and sparks will be harmful so do it outside and away from anything flammable.
How long to make your springs depends on the length of the users calf. I found some numbers online that said that the stilts increased a persons height by 18 to 20 inches. So I measured from the bottom of my booted foot to my upper calf where I knew the spring would be mounted and added 22 to that number. The extra 2 inches is to make up for curve of the spring. I didn't take into consideration the added length that the stilts' feet would give simply because it's not that important.
After I cut them out I cleaned them up with a flap disk on my grinder to remove sharp edges and I was left with two 1 1/4" wide springs that still were quite rigid. Bingo!
Step 3: Leg Attachment Part Thingy


This is our connection with this contraption. The leg frames need to hold onto our leg firmly and the spring firmly. The main body of this is made of 1" x 1" square tubing. The attachment point for the spring was made by welding on a short 1" piece of tubing and then cutting the very top at an angle to avoid any stabbing in the back of my leg. Then I used that cut off piece on the bottom as an added brace.
The cup you see on the end fits over the spring eyelet and has 1/2" holes running in either side to accept the clevis pin that attaches the spring.
The length of this entire upright part should be the length of your calf, from where the bottom of your boot touches the ground to the top, plus 1". That extra 1" is where we're going to attach the lower foot support. Mine is 12", or the length of my foot. There was more than enough material there, so in an effort to lighten the load a little, I decided to cut away some excess. Be sure to leave material around the pivot point though, which should be located 3/4 of the way out on your foot support.
Now that that's in place, I added two supports to offer something to stand on. A 4 inch wide channel made from 1" x 1/8" flat bar placed to support my heal, and a toe plate made from some pieces that I cut out of the truck frame.
I needed a way to attach my ankle straps to the sides of the frames, so I used some 1/2" x 1/2" square tubing to create "C's" that also double as supports for the two pieces of the main frame.
Lastly, I added two lengths of 1" x 1" square tubing out of the sides of the top in a "Y" configuration. The tubing has holes drilled in both sides that act as a means of attaching our top leg brace bar. More on how I made that bar in a later section. The distance between the holes is dependent on how wide your lower legs are. Just remember to allow some space for padding, but only just enough. You want your legs to be held quite securely.
One more thing. As a finishing touch I decided to weld a little 4" long piece of 1" x 1/8" flat bar to the bottom of the foot support for some added strength under my heal. You can see what I mean in the last image.
Step 4: The Feet


Our springs are too sharp and won't function well as a contact point with the ground. To fix that, we need to make some pads or feet that we can attach to the bottom of them to increase their surface area for better stability and grip.
I created some out of 2" flat bar, some 1" x 2" rectangular tubing, and some leftover pieces from the leg frame. The shape of the bottom was just a mimic of the store bought stilts, so that's not too important. The most important part is to make them solid. They needn't be terribly large. Mine are 4" x 2" and function as intended. I cut my 2" flat bar to size and bent it into a nice curve and cut it to shape. I needed brace to reinforce it and also to act as a flat mounting surface for the bracket to weld on to. I had some pieces left from removing material on the bottom of the foot supports, so I used that. It's basically just 1" C channel that I shaped with a grinder and welded in place. After that was the mounting bracket. This is where we determine the angle of our feet. We want them to be as level with the ground as we can get. So to do that, I placed the bottom of the spring in line with the underneath of the foot support where the center of my weight would be. Then, I measured the angle taking into consideration some slight bend in the spring that would exist when I'm standing at a rest on the stilts. I cut the bracket out, drilled the necessary mounting holes, and welded it in place.
I added the rubber much later but I'll place it here just to keep some order. I cut out some tread from a bike tire and epoxied it in place using JB Weld. Please be sure to clean both surfaces very well before gluing.
Step 5: Connecting Arm


This part is pretty straight forward. Without this arm, the stilts would be useless as we would have no control over the spring at all. The arm attaches to the bottom of the foot support and to a pivot point mounted halfway up the spring. These pivot points were made from 1" x 1" square tubing and 1 1/2" flat bar.
The point needs to be equidistant from the ground and the point where the arm attaches to the foot support as far as I can tell from the Images I've seen online. First, place the bottom of your spring underneath the center of your foot support. Then use a tape measure clamped to the foot, ran up the spring and creased, before being ran up to the pivot point on the support. so you create a bend in the tape measure at the halfway point between them and get that number there. In my case, the length was 26" so the center crease in the tape measure was at 13" up the spring, and that's where we mount the pivot. There are probably better ways of doing it but this is what I came up with.
Mark the spring and drill the respective holes before mounting the pivot point with some 3/8" bolts.
The arm itself is just made by welding some 1" x 1/8" flat bar to the sides of a piece of 1" x 1" square tubing. The holes were drilled in the flat bar to leave exactly 13" between the pivots.
Step 6: Straps


Straps are obviously imperative to holding these stilts on. My mom was kind enough to sew the buckles on to the straps for me with her machine, but unfortunately, I couldn't get the stilts into the machine to sew the straps on to the frames themselves. So, instead of taking the time and hand stitching like a normal person, I gorilla glued the straps and pop-riveted them in place with some custom washers made from some 1/2" x 1/8" scraps of steel. I would recommend just taking the time to hand stitch them instead though.
The toe strap I just threaded through the hole in the toe plate and it's stronger than any stitch ever would be. That was a lucky and unintentional design feature haha.
I'm including the upper leg bar in this category as well. It's just a piece of 3/8" threaded rod that's bent into a "U" shape and poked through the holes in the "Y" at the top of the leg frame. That way it's fully adjustable. I wrapped the part of the rod that comes into contact with my legs in tape, added the pipe insulation, and then wrapped that in electrical tape again to protect it.
I'm just using a jam nut set-up to secure them. Add two nuts to both sides of the brace before putting it through the frame and then add a nut on each side from the back to hold it in place.
Step 7: Test!


That was a lot of information, but now we get to see the final results!!
I'd like to mention here that when I did some testing with these they did seem a little bit weak. Hence why I added the two trampoline springs by drilling a small hole in the leaf spring only just big enough for the two spring ends to fit into so as to not weaken the springs. I simply stretched the springs from this hole to the welded support on the bottom of the foot support. Problem solved!
My final stilt weight was about 11.5 pounds. Over my goal? Yes. But they didn't seem to be that heavy at all upon trying them out.
Please see the end of the YouTube video at the beginning of this Instructable to see them in action and to hear about some possible improvements that could be made.
Step 8: In Conclusion

These were fine and they performed well... but I still didn't meet my life long goal of becoming a superhero. So I developed another plan! If you guys are interested and I get enough support, I will try to build a set of super-stilts that are pneumatically boosted and might allow me to jump up to or even over 8 feet! It's a terrible idea, but that's never stopped me before haha.
I guess that's about all folks. I'd like to say that I really appreciate you getting to this point in my Instructable. I hope you enjoyed your time here learning and reading, and if you did please let me know by showing some support on my YouTube channel. I'm trying my dangdest to make a go of a YouTube channel so your support there means everything. There will be many more fun projects like this in the future, trust me!
I hope this project maybe inspired some of you to realize the possibilities of building and working with your hands, or it entertained you at the very least. I'd love to hear your thoughts on this and I'll be very happy to answer any questions that you may have.
Thank you again and best regards...
-Tate
Please be very careful if you replicate this and know that I can't be held responsible for any injuries or damages associated with the making or usage of this project.
Step 9:
Now that my making capabilities have reached this point, I decided it was time to try to build some! (leading to the more powerful first reason.) And... these were fine and they performed well... but I still didn't meet my life long goal of becoming a superhero. So I developed another plan! If you guys are interested and I get enough support, I will try to build a set of super-stilts that are pneumatically boosted and might allow me to jump up to or even over 8 feet! It's a terrible idea, but that's never stopped me before haha.

Participated in the
Reuse Contest


