In this guide, we are going to discuss various methods to capture a screenshot on your Asus laptop. Most users believe that taking a screenshot differs from laptop to laptop. But in reality, the general process of taking a screenshot remains the same for almost all Windows-powered laptops. As Asus also ships its laptops with Windows OS, you will find it pretty easy to use the screenshot feature.
Going forward, we will discuss various methods that you can use on pretty much any Windows-powered Asus laptop. Different methods will offer you slightly different results and you should try each method mentioned below to get an idea about it. With any of the methods mentioned here, you will still get the same quality screenshot, but the method and time required to save the image may vary.
1. Use The Print Screen Key
The Print Screen button is the universal option for all Windows-powered laptops and desktops to take a screenshot. It is a keyboard shortcut key that offers many different combinations for taking a screenshot. Here’s the most basic method of taking a screenshot via the Print Screen button.
- To take a screenshot with the Print Screen button, you simply need to press the button once.
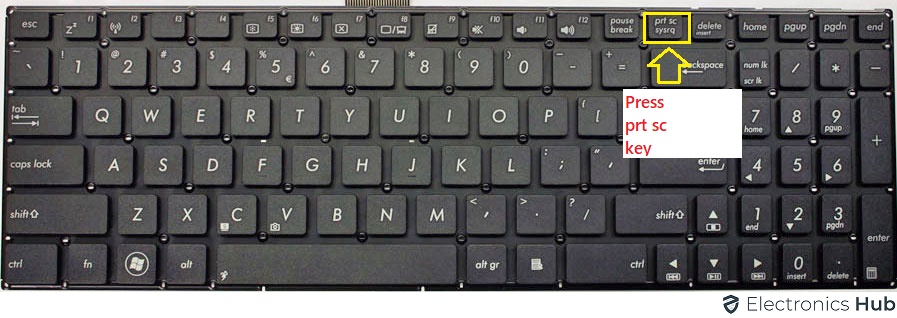
- Given that you have the content that you wish to capture on the screen, the Print Screen button will capture an image of it and save it on your clipboard.
- To use the screenshot, you will have to paste the image on MS Word or MS Paint.
- In these programs, you can further edit your screenshots quickly.
- Once you are finished, just press the “Ctrl” + “S” buttons to save the image.
2. Use The Print Screen + Windows Key Combination
If you haven’t noticed, the above-mentioned method for taking a screenshot is a bit lengthy and time-consuming. Fortunately, you get an alternative method with the Print Screen button to take a quick screenshot.
- To do that, simply press the “WinKey” + Print Screen button on your Asus laptop.
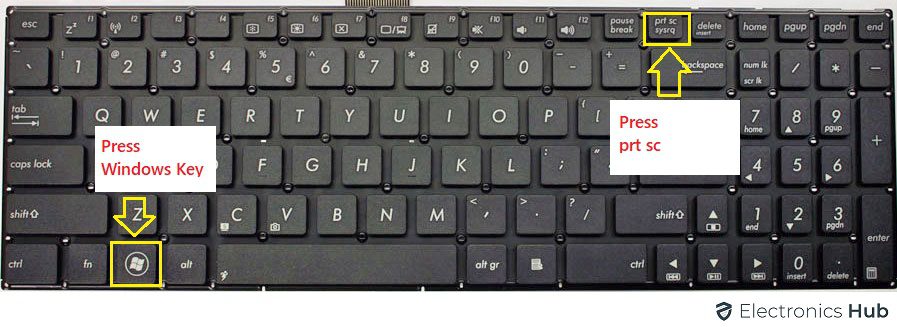
- Once you do that, you will observe a short animation that shows that the screenshot was successfully captured.
- After you take the screenshot, it will be instantly saved in the default screenshot folder on your computer.
- For Windows computers, the screenshot folder is present in the User>Pictures folder
- Once you get to the screenshot folder, you will see all of the screenshots you captured, arranged according to the date and time.
3. Use the Snipping Tool in Windows 10
Windows also offer a built-in tool for taking a screenshot. It offers many additional methods and types of screenshots which you might need. Here’s how you can use the snipping tool.
- Search Snipping Tool in the Windows 10 search bar and open the software by clicking on the first result.
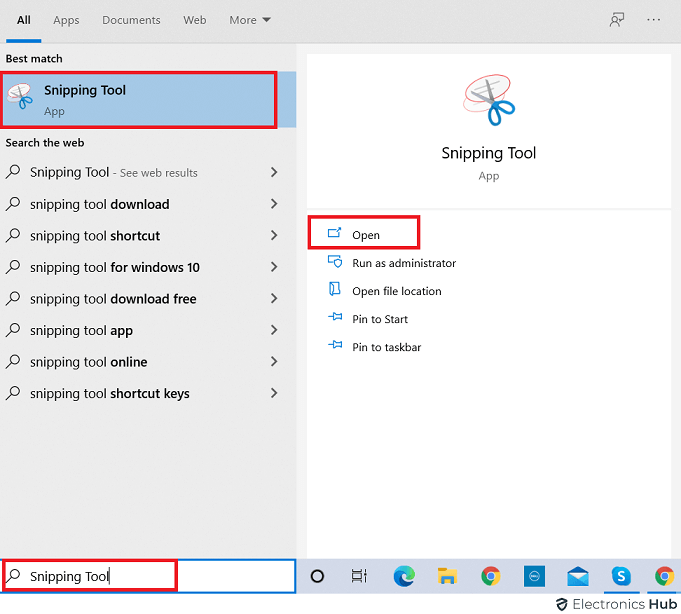
- You can identify the program by the little scissor icon.
- In the latest version of Windows 10, you will also find the “Snip & Sketch” app which is the same as the snipping tool.
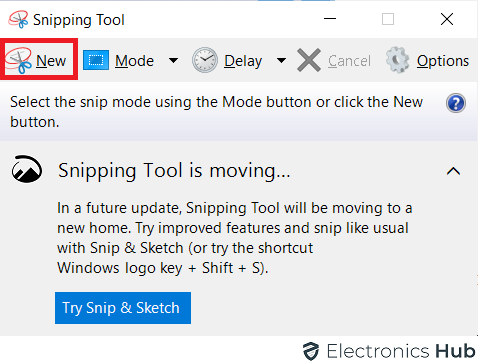
- Once you open the app, you will be greeted with the main window.
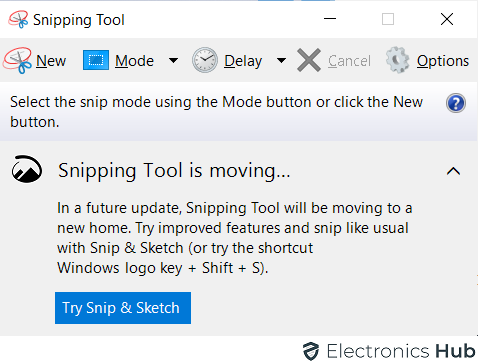
- On the top right section, you will see the “New” option which you can use to start taking a new screenshot.
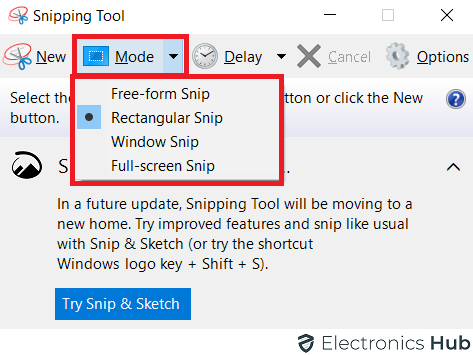
- You can also select the screenshot modes from the “Mode” option in the top bar.
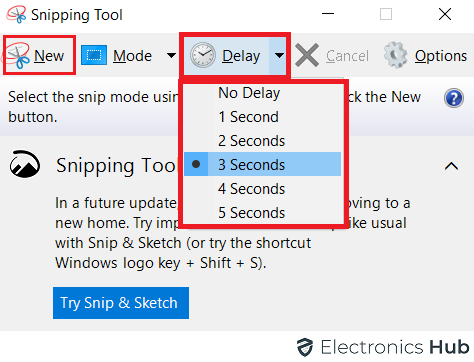
- If you wish to time your screenshot perfectly, you can use the delay feature that allows 1 to 5 seconds of delay after clicking the “New” button.
- Taking a screenshot with the snipping tool is pretty easy, except it requires you to open the app first which consumes more time.
4. Use Windows and H Key Combination
In Windows OS, the Windows and H key combination is a shortcut for directly sharing the active display as a screenshot. If you use this method, you will be able to instantly share the screenshot with anyone without even needing to save it first. This is perfect for casual screenshots that you would delete later anyway.
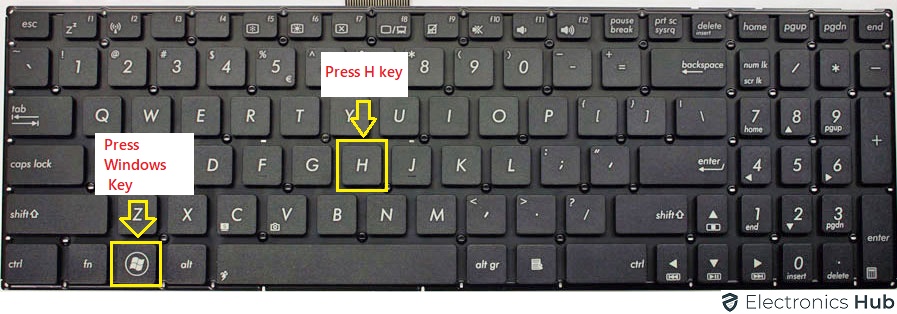
- Before you press the combination, make sure you have the window open which you want to save as a screenshot.
- Now, simply press the “WinKey + H” combination on your keyboard.
- This will open the sharing section on the right side of your screen. Here, you can see multiple sharing options for your screenshots.
- Simply, choose the option that you want to use for sharing the screenshot and share it instantly.
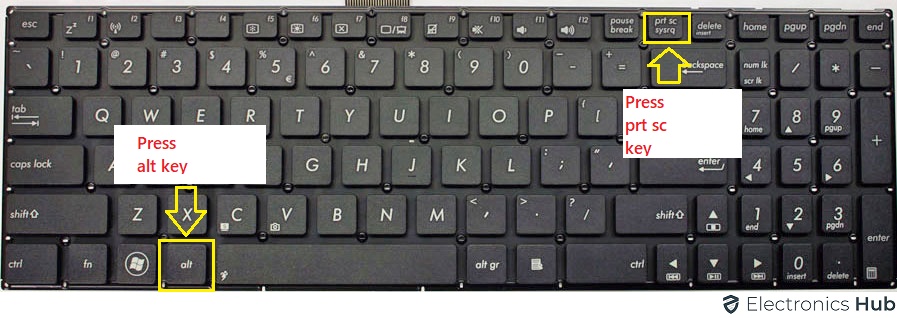
5. Use ALT + Print Screen Key Combination
Print screen button offers many different shortcuts that allow you to take different forms of screenshots instantly. One such combination for a shortcut is the ALT and Print Screen button. This will let you capture the screenshot of a specific window that is active on your display.
- Once you are on the window that you want to take a screenshot of, press the “ALT” + “PRT SC” buttons.
- Once you do this, a screenshot will be automatically saved on your clipboard.
- Keep in mind that it will only take a screenshot of the active window on your display.
- If you have multiple tabs or windows open on your display, it will only capture the one that you are actively using.
- The screenshot is present in your clipboard and you have to paste it somewhere to further use it. We recommend using MS paint for quicker saving.
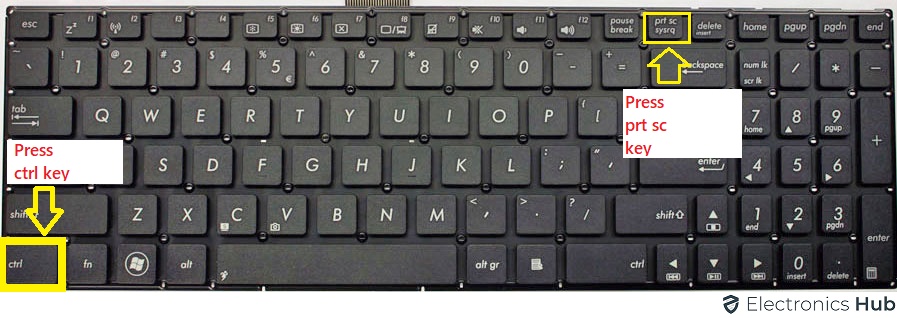
6. Use CTRL + Print Screen Key Combination
If you want to take a screenshot of the entire screen, you will have to use the combination mentioned here. This is basically an alternative for the Winkey and Print Screen combination which offers the same results. Except, with this method, you get the screenshot in your clipboard which you can paste in editing software for social media directly.
- To take a screenshot of the entire screen, just press the “CTRL” + “PRT SC” buttons on your keyboard.
- This will take a screenshot of your entire screen, including both active and inactive windows.
- To use the screenshot, you will have to follow the methods explained in previous solutions.
- As the screenshot is in your clipboard, you can either paste it directly into social media messengers to send it or edit it further in apps like MS Paint.
7. Use FN + Print Screen Key Combination
You might be familiar with the Snipping Tool in your Windows 10 Asus laptop. If not, you can find detailed information on the tool mentioned in this guide. But, to use the tool, you can use a shortcut combination which is “FN” + Print Screen. This works the same as the “Shift” + “WinKey” + “S” key combination.
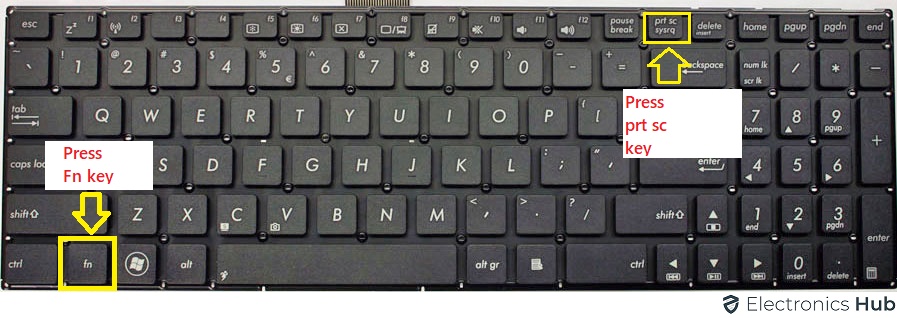
- Once you press either of the combinations mentioned above, the snippet screen capture window will open.
- This also converts your cursor into a + shape for precise operation.
- For taking the screenshot, you have to click and drag the cursor across the area that you wish to save.
- If you don’t want a rectangular screenshot, you can also use the free form snip option provided on the top of the window.
- Once you have captured the screenshot, you will find it in your clipboard for further application.
8. Use 3rd Party Software (Lightshot)
Lightshot is a very powerful application designed specifically to take screenshots on Windows as well as macOS computers. For your Asus laptop, this software will definitely be the right choice if you want detailed screenshots with additional customization options. You can download the software directly from the link given here: https://app.prntscr.com/
As for the features of the software, you will be able to capture a screenshot of a selected area quickly with the program. It also allows direct upload to the internet which helps you create a reliable backup instantly. You can also use the program to search for similar images on the internet by taking a screenshot on your screen. It is very easy to use and offers a built-in online image editor.
9. Use Browser Extension for Web Pages
If you require a method to take screenshots of web pages present only on your browser, you should consider adding an extension to your browser for the same. There are various types of extensions present on the extension store for browsers that offer different methods and screenshot forms.
Popular 3rd party screenshot tools like Lightshot and Fireshot also have special extensions available for browsers which you can install from the extension store page of your browser. Generally, you will find a lot of extensions for the Google Chrome browser. But, make sure you install a trusted extension on your browser to stay safe from adware and malware attacks.
10. Taking a Screenshot With Cursor Enabled
In all of the methods mentioned above, you will notice that your cursor disappears while taking the screenshot. This can be a problem if you wanted to point at a certain section or part of the screenshot via your cursor. While you can always add the markings from other programs, it requires extra time which is not ideal in most cases. To take a screenshot on your Asus laptop with the cursor enabled, follow these steps:
- To take a screenshot with the cursor enabled, you will have to use a built-in windows app called Steps Recorder. To open the app, simply search it in the Windows search bar and click on the top result.
- This will open a compact Steps Recorder window.
- This program is generally used while creating guides as it automatically records the screen with markings for the active window as well as the position where you are clicking with your cursor.
- To help you further, the app also adds a little description with each screenshot for further explanation.
- Once you have finished taking the screenshot, click on the Stop Record button.
- Now, the app will show you all recorded steps in the form of a quick guide.
Conclusion
We hope that you have managed to capture the perfect screenshot on your Asus laptop by following our guide. As we have given you a lot of options for taking a screenshot, you will certainly find more than one option that is suitable for you. If you are facing any problems while following the solutions provided in this guide, you can reach us via the comment section present below. You can also bookmark our guide right now for quicker access in the future.
