Create a spectacular Microsoft PowerPoint presentation by adding in a moving background. You can turn any video into a moving background, so get creative and use a video that will help students further understand and later recall your lesson!. There are many ways to create engaging PowerPoint presentations, and adding a moving background is a favorite trick!
Moving backgrounds in PowerPoint may seem intimidating, but it does not need to be left for PowerPoint pros! It can actually be done very easily. You only need some basic PowerPoint knowledge and have a video in mind to use. Then, you will have no issue incorporating a background that moves into your next presentation. Let’s get started! For a more visual walkthrough, watch the video at the bottom of the page!
How to Create a Moving Background in PowerPoint:
Step 1: Add a Video to your Slide
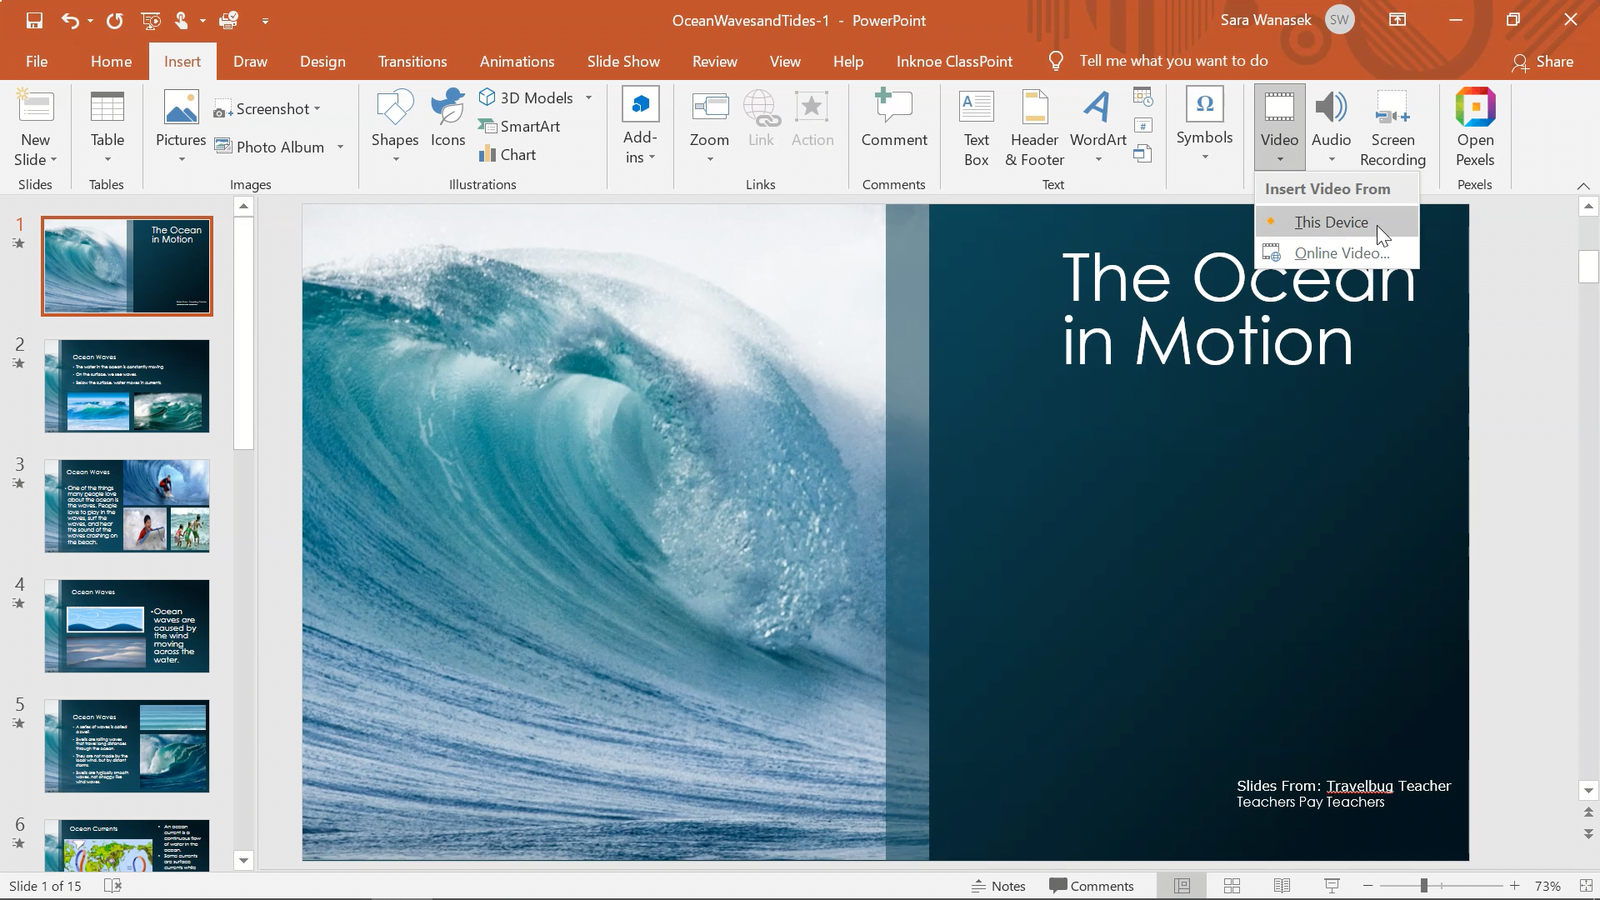
The first thing you will need to do to create your moving background is to go to the Insert tab in the PowerPoint ribbon and click on Video. Here, you have two choices: to upload a video from your device or to insert an online video.
When inserting an online video, paste the URL from any Youtube video. In this example, we will upload a video we already have from our device. Select the video from your files and click Insert.
Step 2: Resize & Move Video
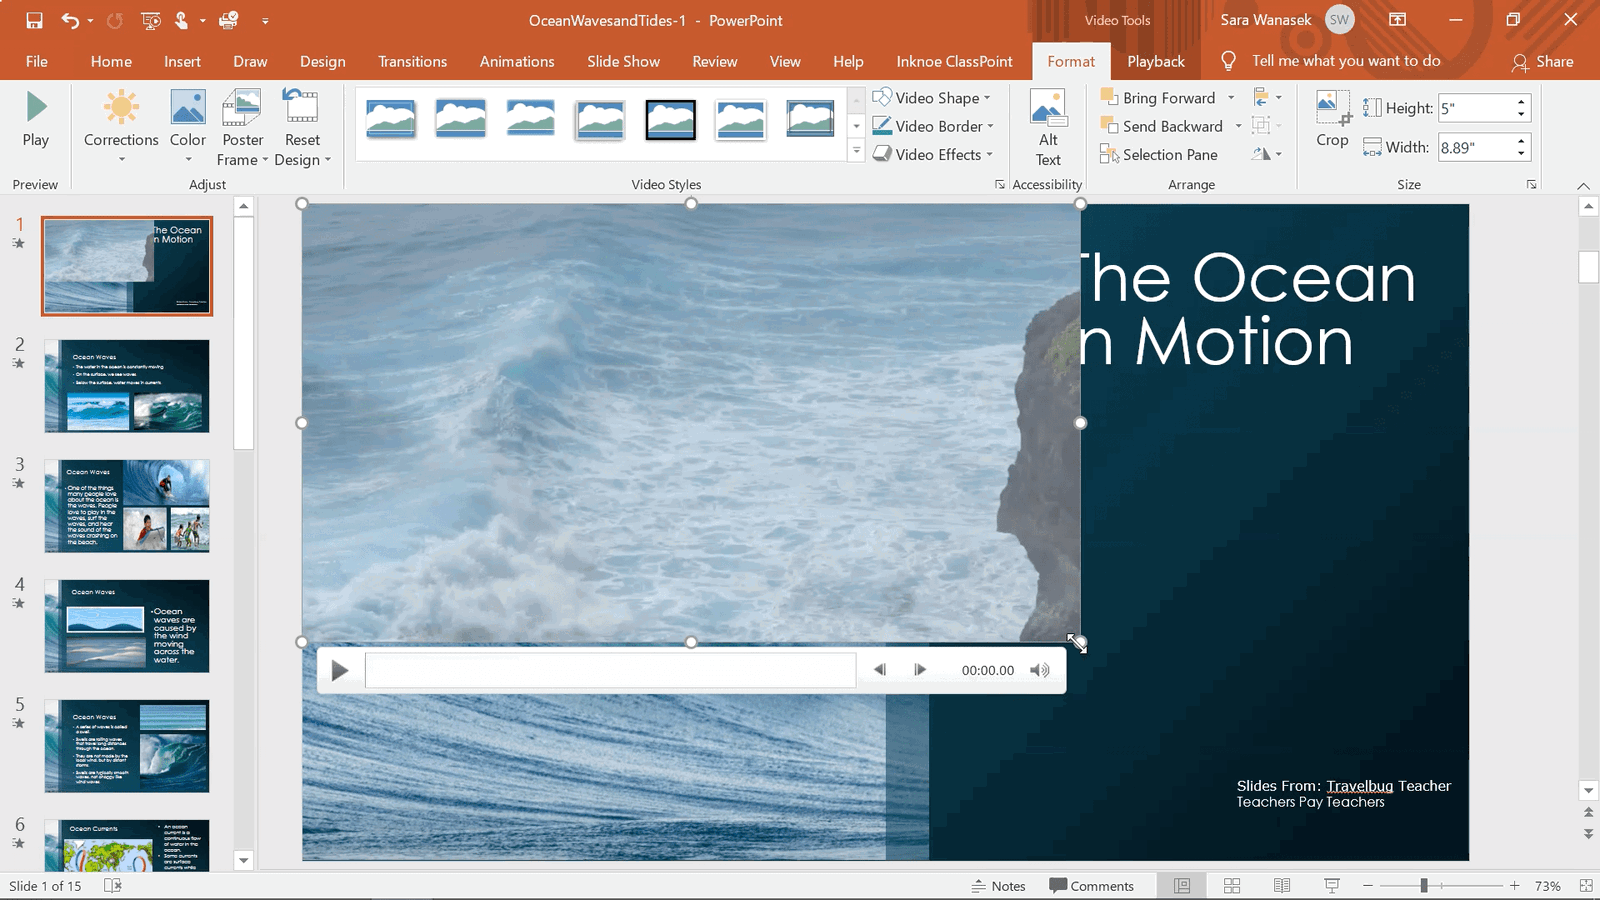
Once the video has been placed on your slide, you can move and resize it. To create the moving background effect, move the video so that the top left corner aligns with the top left corner of the slide. Then, drag the bottom right corner of the video all the way to the bottom right corner of the slide. Your video should now take up your whole slide.
Step 3: Send Video to the Back
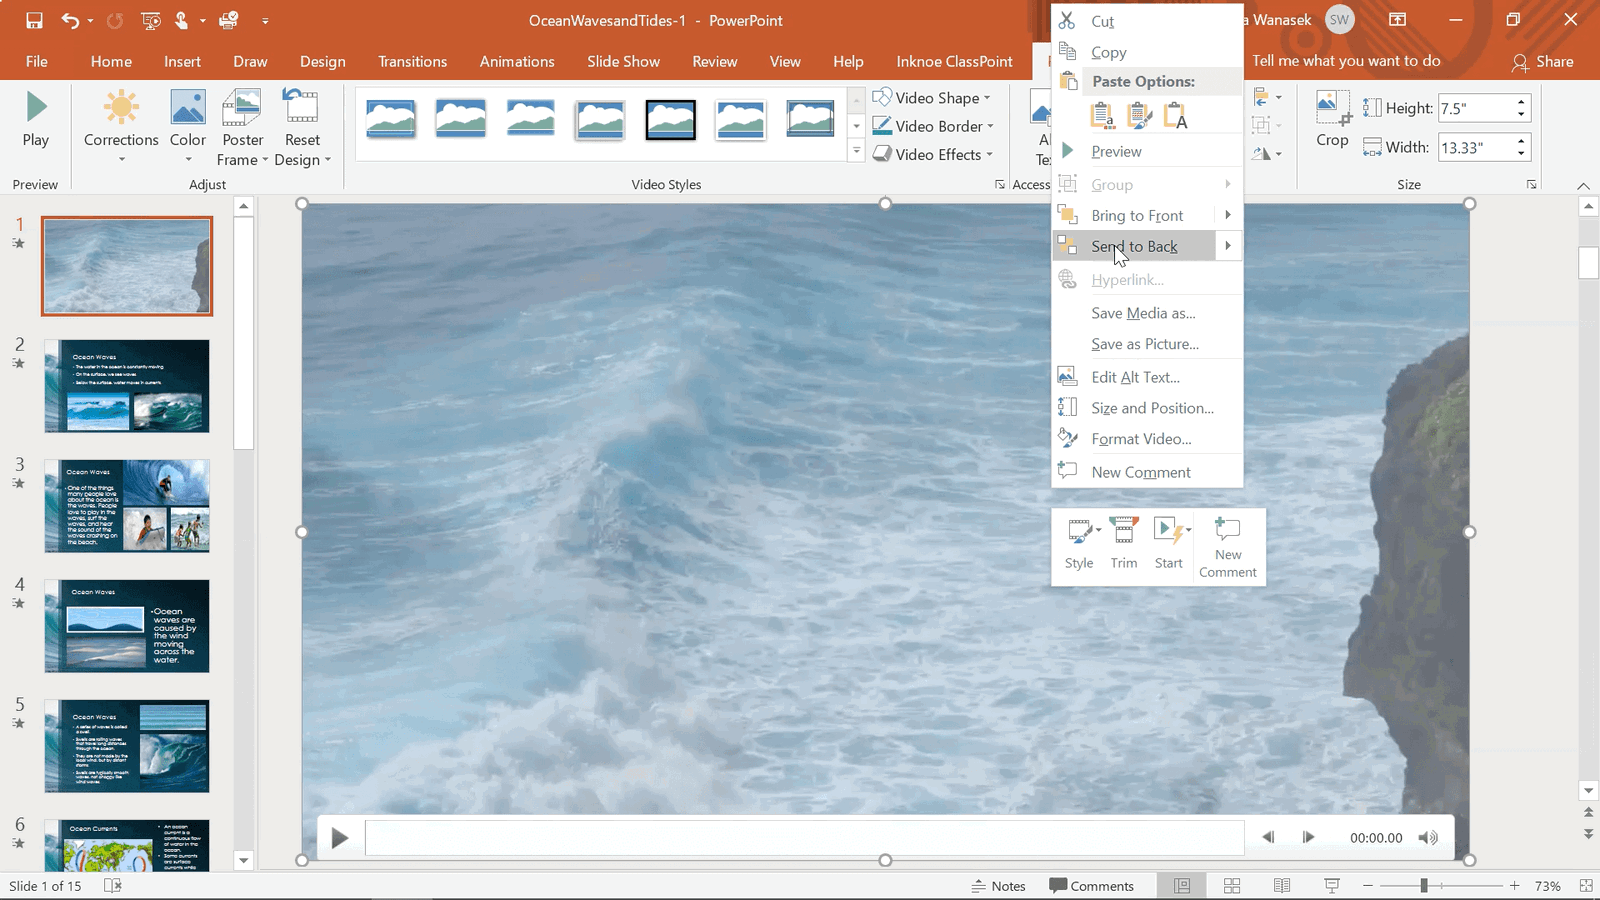
The next step here is to have this video be the background of your slide so that any text or images appear on top of the video. To do this, right-click on the video and select Send to Back. Now, you should see any objects on your slide appear on top of the video.
You can preview this in Presentation Mode to see if you like the way it looks. To edit the timing of the video, follow Step 4.
Step 4: Edit Playback & Format Options
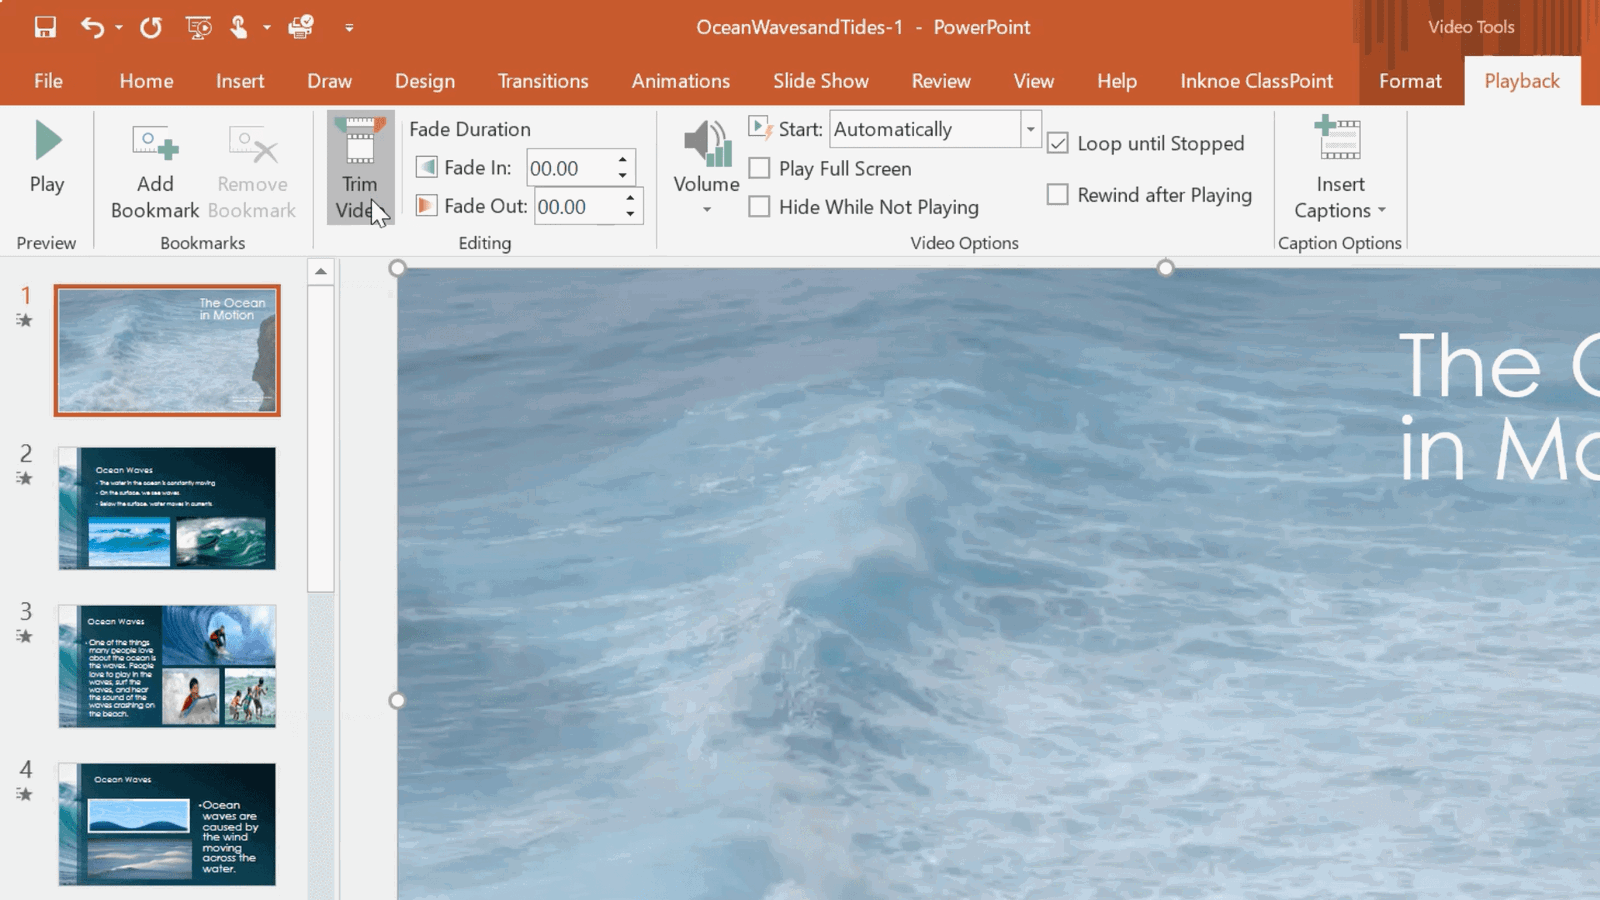
After a quick preview of your video, you may want to make some formatting and playback changes. To do this, click on the Playback tab of the Video Tools tab in the PowerPoint ribbon.
1. The first change that we highly recommend, is to Loop your video. This way, when the video is over, it will replay right away without you having to click again. In the Video Options section, check the box next to Loop until stopped. Your video will now play until you change slides.
2. Next, we recommend having your video start automatically so that you do not have to click on the slide for it to begin. In the Start drop-down menu, choose Automatically. Some teachers may choose to leave their video to start with a click if they want to wait to begin the video. Choose the option that works best for your lesson.
3. Lastly, PowerPoint has some simple video editing tools, like trimming that you can use. If you want to cut some of the beginning or end of your video, click the Trim Video button. Then just drag the bar at the beginning and the end of the video to how you want it.
Feel free to explore the other editing options here to make your moving background perfect for your own presentation!
Step 5: Annotate on your Video
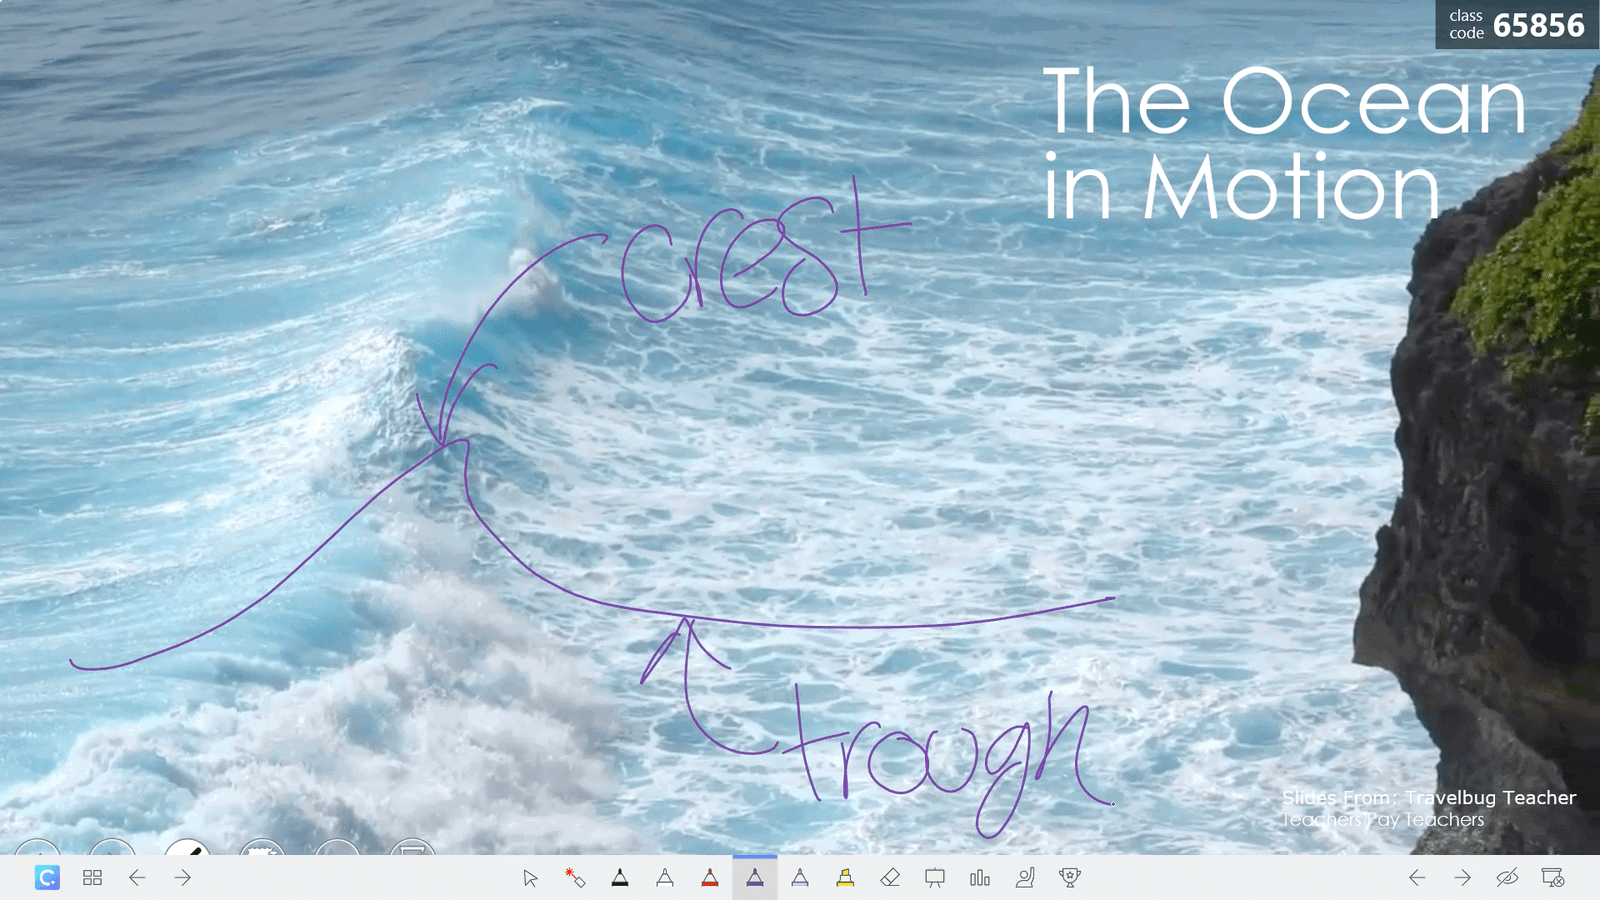
Once all the edits are done, and you have previewed your video ensuring perfection, you are ready to use this in your classroom! With PowerPoint, and more accessibly with the add-in, ClassPoint, you can use annotation tools to write over your video. This will help to call out information & help students understand in a new, clear way.
With ClassPoint, you gain a toolbar on the bottom of your slide, that adds user-friendly, yet advanced annotation tools including different colored pens, shapes, and text boxes, you can annotation right on your slide. And when you presentation is over, you can choose to keep or remove any added presentations.
Learn more about ClassPoint and the many ways you can enhance your presentations with audience engagement tools.
For a more visual representation, watch the video below! Drop us a note in the comments below if you have used this engagement tip before and how it worked for you and your students!
Check out the # Topic: PowerPoint below for more PowerPoint tips and tricks and check out ClassPoint and see how it can enhance your PowerPoint presentations. 😊
