[MotherBoard] UEFI BIOS EZ MODE GUI Introduction
The Unified Extensible Firmware Interface (UEFI) relative to Legacy BIOS, ASUS UEFI BIOS provides more user-friendly graphical interface and mouse support. The ASUS motherboards currently on the market all support UEFI BIOS.
1. How to confirm the motherboard supports UEFI BIOSUEFI BIOS
3. ASUS UEFI BIOS EZMODE GUI Introduction
1. How to confirm the motherboard supports UEFI BIOSUEFI BIOS
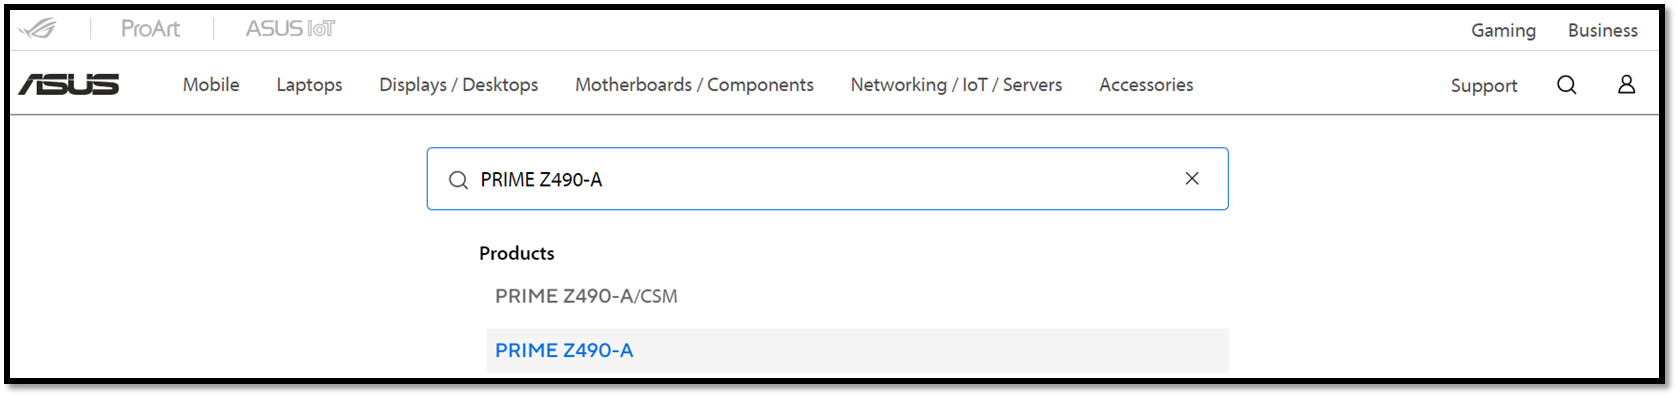
Step 1:Please go to ASUS official website:https://www.asus.com/ and Click the magnifier icon in the upper right

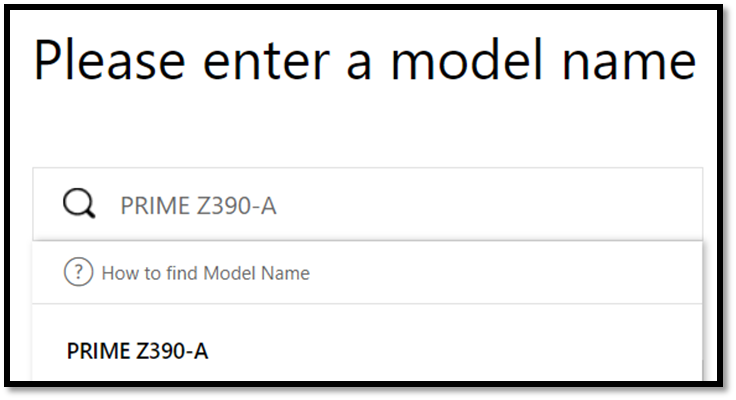
Step 2: After the search bar appears, enter the name of the motherboard (example: PRIME Z490-A), list the product model and click to enter the official website of the product
Step 3:Click Tech Specs
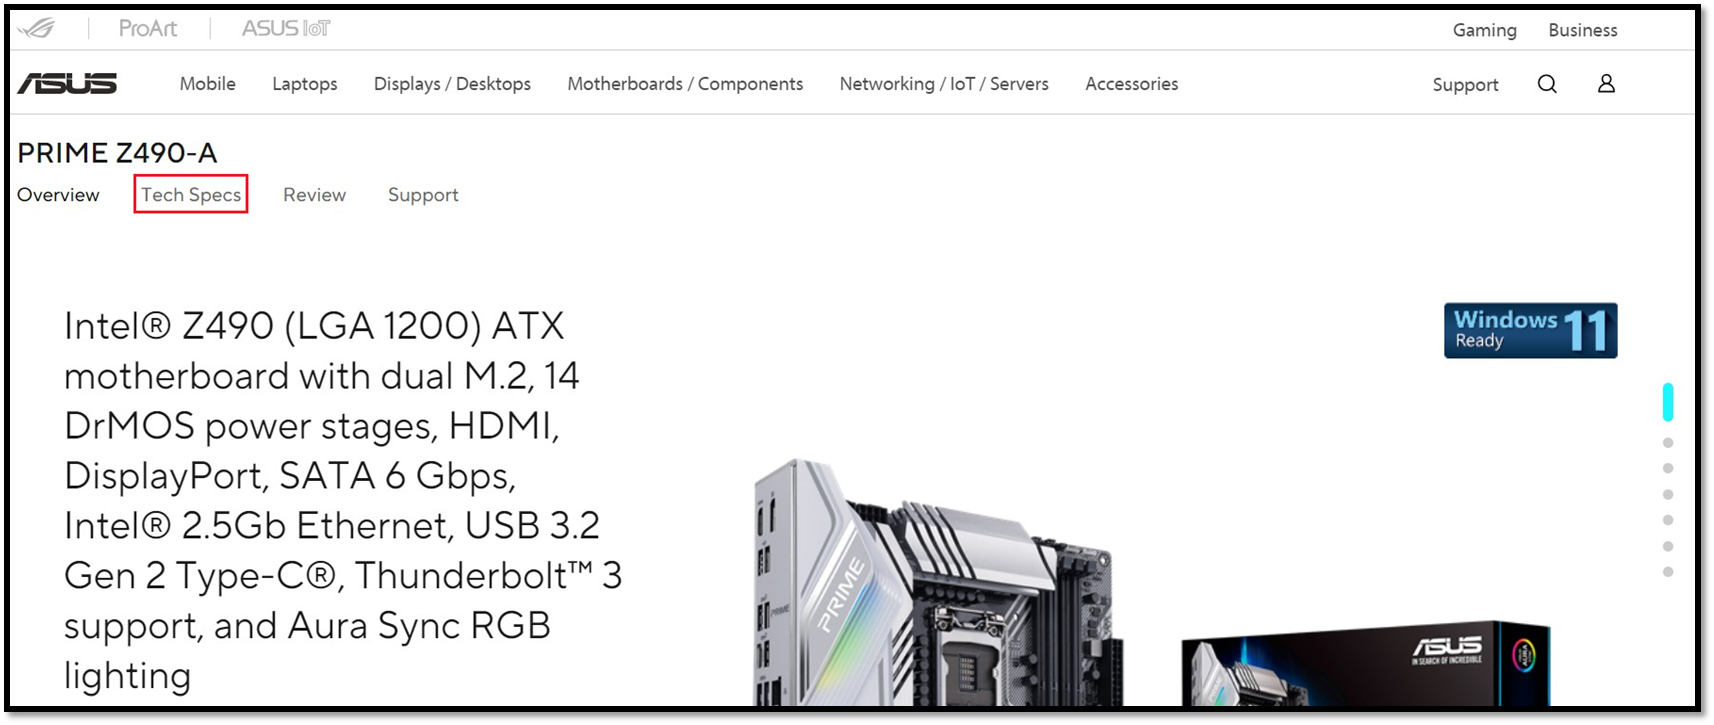
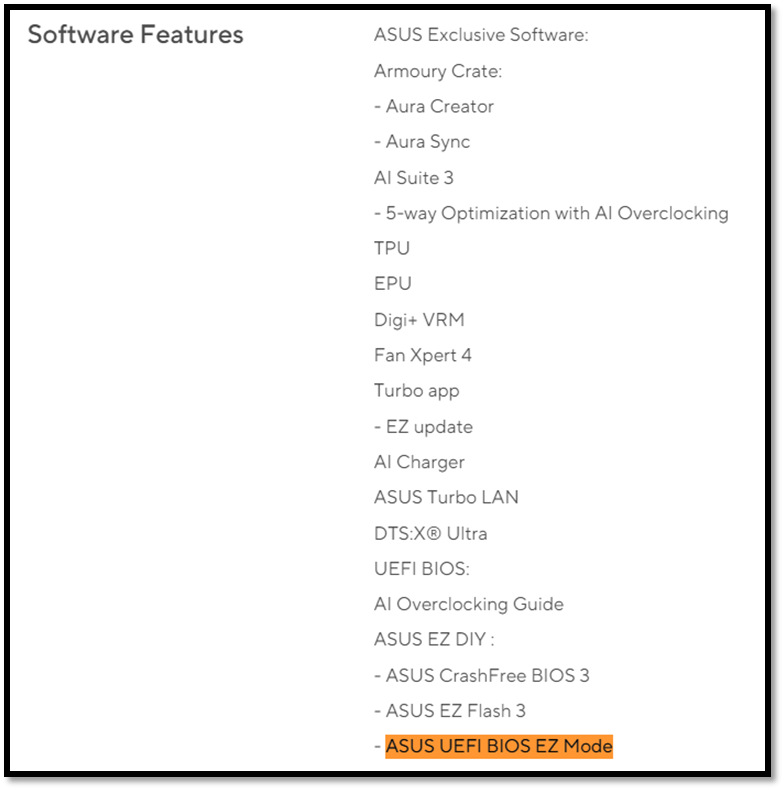
Step 4: Confirm that the software features supports ASUS UEFI BIOS EZ mode.
After booting, press DEL or F2 when show ASUS LOGO to enter the UEFI BIOS.

3. ASUS UEFI BIOS EZ MODE GUI Introduction (Example:PRIME Z490-A)
After entering the UEFI BIOS, the following screen will appear:
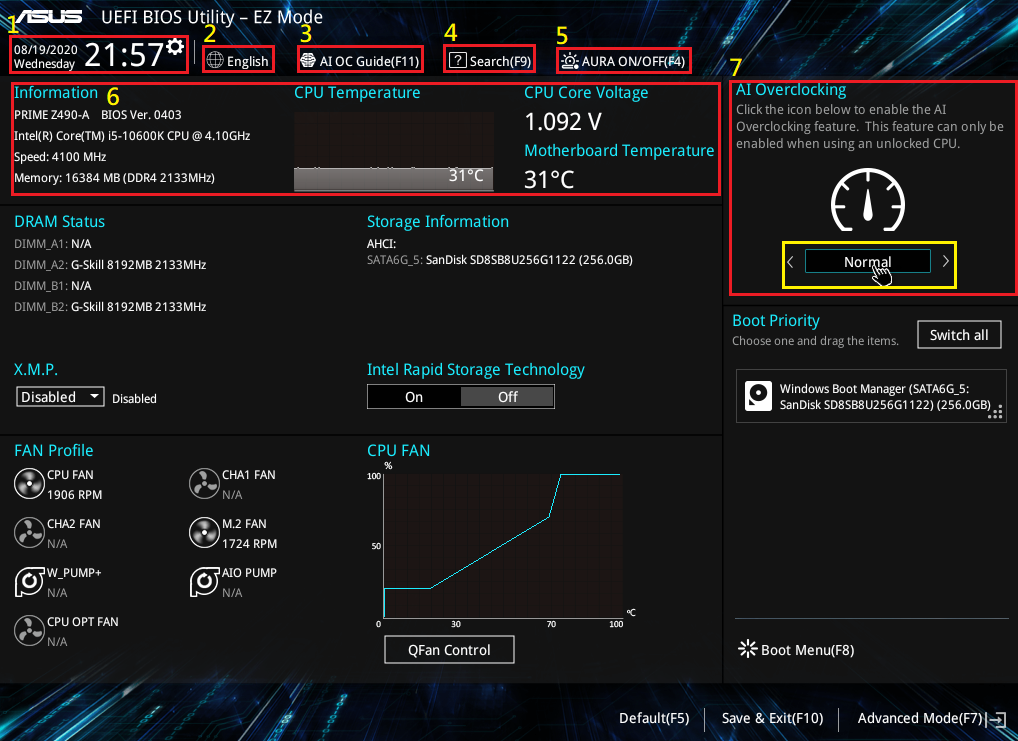
1. The following introduces the various functions of the EZ MODE interface.
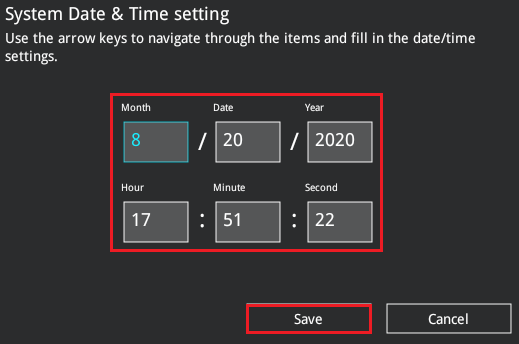
2.  Time: Adjust the date and time of the motherboard, click Save after the adjustment is complete.
3.  Language: switch the display language function.
4.  AI OC Guide (F11):After clicking, the following screen will appear, click Enable AI to start the AI overclocking function.
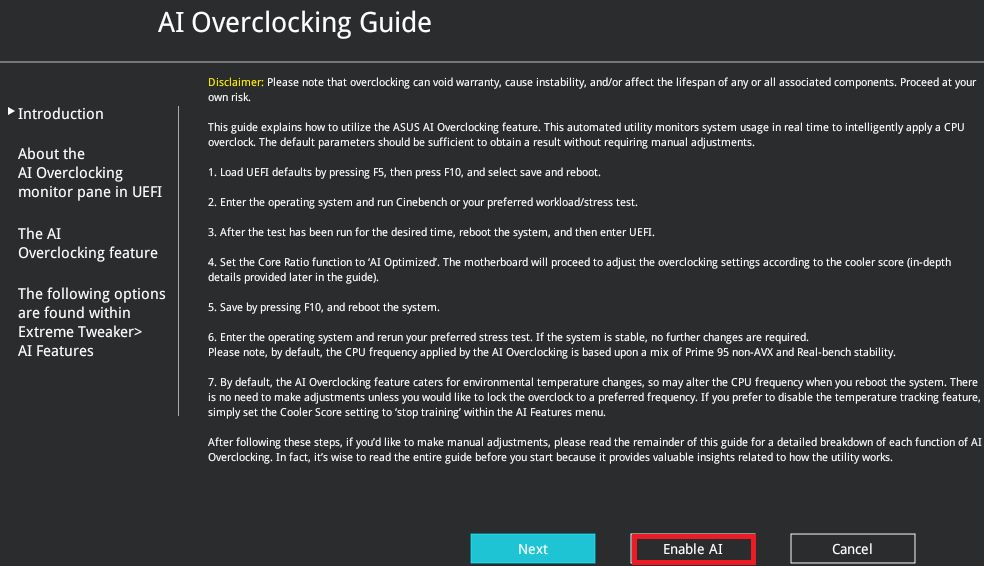
5.  Search(F9):Search keywords to find related project functions.
6.  AURA ON/OFF(F4):To turn on or off the RGB LED or function indicator (refer to FAQ: Q1), the following items are set:
a. [All On] :RGB LEDs and functional indicators on.
b. [Stealth Mode] :RGB LEDs and functional indicators are off
c. [Aura Only] :RGB LED on, functional indicator off.
d. [AURA Off]:RGB LED off, functional indicator on
7.  Information:Indicate the current motherboard model, BIOS version, CPU and memory related information.
8.  AI Overclocking:The AI overclocking function is enabled or disabled, click to switch the mode, there are the following two modes.
Normal Mode: Does not perform AI overclocking function.
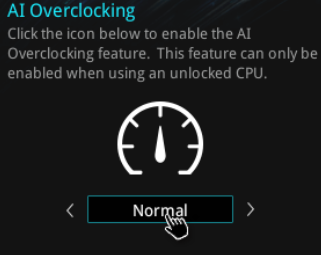
AI Overclocking Mode: Enable intelligent overclocking

*For more detailed AI Overclocking, please refer to the link below https://www.asus.com/support/FAQ/1043257
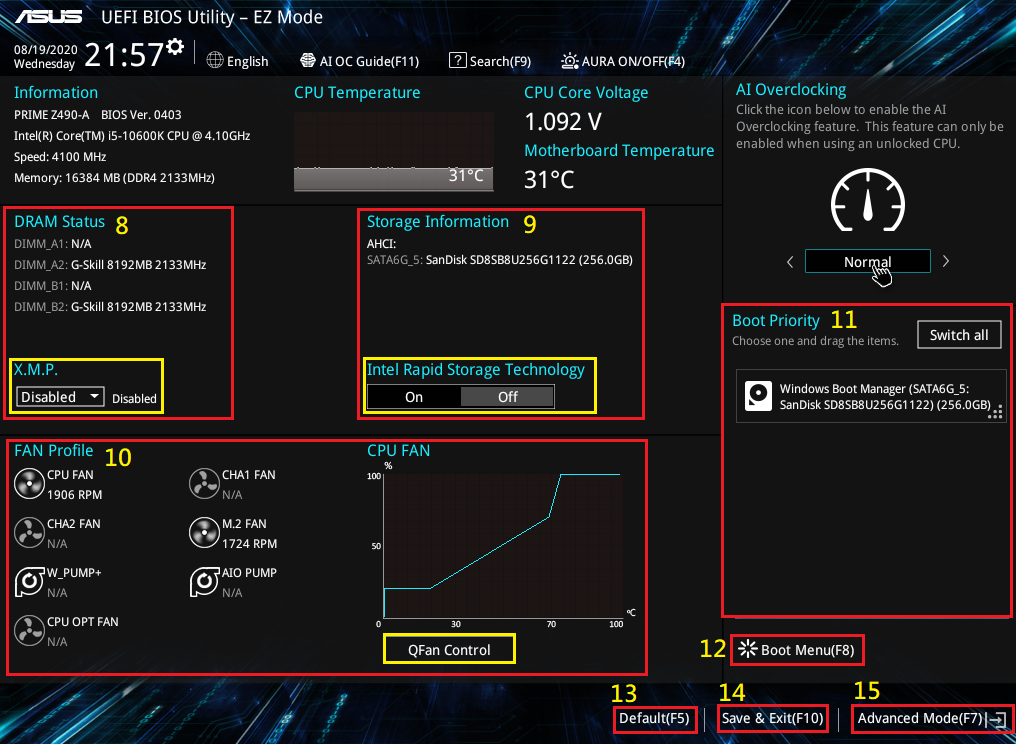
9.  DRAM Status:Display memory slot information and set X.M.P. function.
X.M.P.:This project can be opened with certified X.M.P. memory , there are the following modes to choose from.
a. [XMP I]:Automatically loads ASUS optimized memory parameter settings.
b. [XMP II]:Automatically load the default XMP profile in the memory itself.
c. [Disable]:Do not use X.M.P. functions.
10.  Storage Information:Displays the currently used storage device and confirms that Intel Rapid Storage Technology (IRST) function. For details of IRST, please refer to the following Intel official website:
https://www.intel.com.tw/content/www/tw/zh/support/articles/000005610/technologies.html
11.  Fan Profile:Displays the current status of the system fan or CPU fan.
Q-Fan Control:The related settings are as follows :
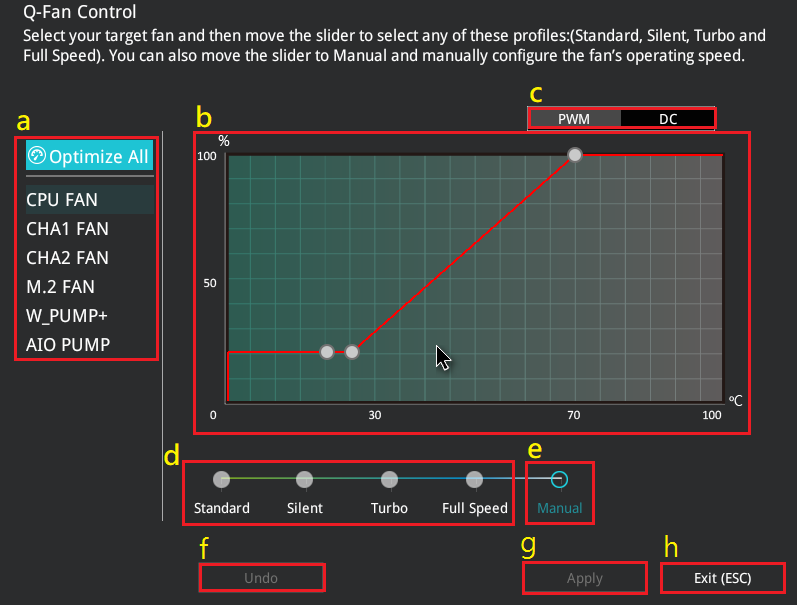
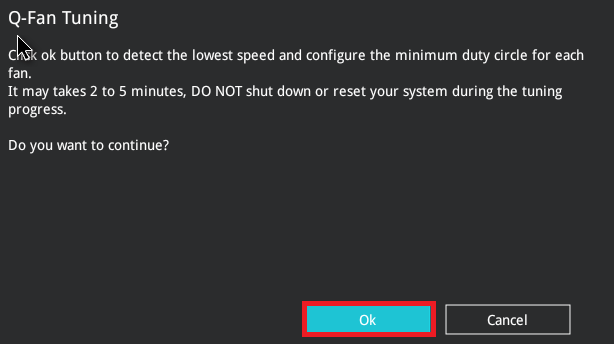
a-1 .  Optimize All:Automatically adjust all fan optimization settings. After clicking Optimize All, the following screen will appear. Click OK to start execution.
Notice: The process expected to take 2-5 minutes, please do not turn off the computer or restart the computer during the process.
a-2. 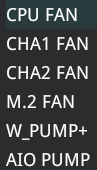 CPU FAN、CHA1 FAN、CHA2 FAN、M.2 FAN、W_PUMP+、AIO PUMP,The operation mode of the fan can be individually set.
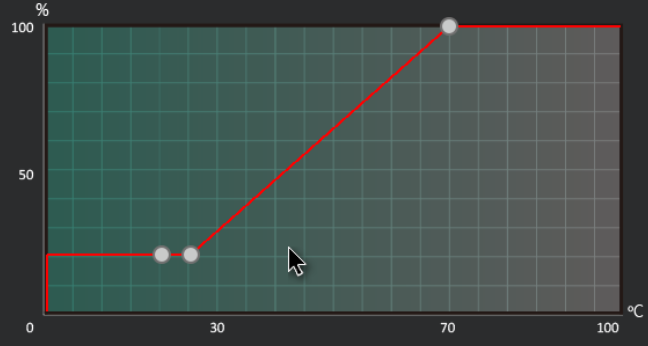
b. Curve window: Displays the current fan speed setting value, and the fan setting curve can be adjusted in the custom mode (manual)
c.  PWM / DC:To set PWM or DC mode (refer to FAQ: Q2)
d. 
Fan Mode Settings: Standard、Silent、Turbo、Full Speed,The fan curve cannot be adjusted in this mode, all are the default settings of ASUS, please refer to the following screen.

e.  Manual:You can customize the fan setting value, you can drag and drop on the picture below to set
  .
.
f. Undo
g. Apply
h. Exit (ESC)
12.  Boot Priority:Adjust the boot order of all storage devices, which can move by dragging.
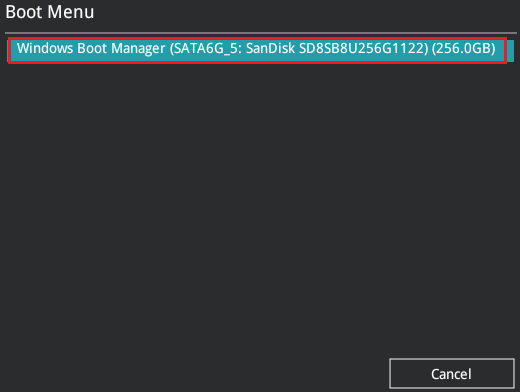
13.  Boot Menu(F8):Click on the storage device to reboot "immediately" and boot with the selected storage device.
14. Default (F5):
15. Save & Exit (F10)
16. Advanced Mode (F7)
Q1: What is the difference between RGB LED and functional indicator?
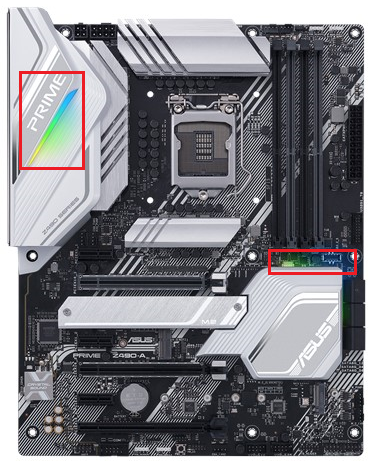
A1: RGB LED: AURA lighting effect on the motherboard, the reference example is in the red frame
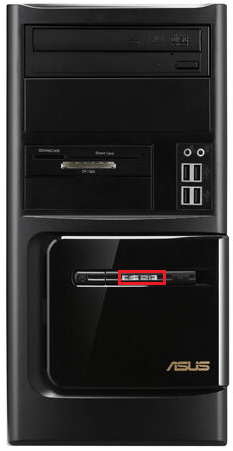
Functional indicator: the power or hard disk indicator on the computer case, the reference example is in the red box below.
Q2: How to confirm whether the fan I use should choose PWM or DC mode?
A2: PWM: 4PIN fan use
DC: 3PIN fan use
Q3: Can I refer to the advanced mode?
A3: You can go to the following link to download the BIOS manual Intel 400 Series:
AMD 500 Series:
https://dlcdnets.asus.com/pub/ASUS/misc/Manual/PRIME_TUF_GAMING_B550_Series_BIOS_EM_WEB_EN.pdf
For other models, please refer to the user manual for BIOS operation settings. The download steps are as follows (example PRIME Z390-A):
Step 1: Click the link to ASUS Download Center.
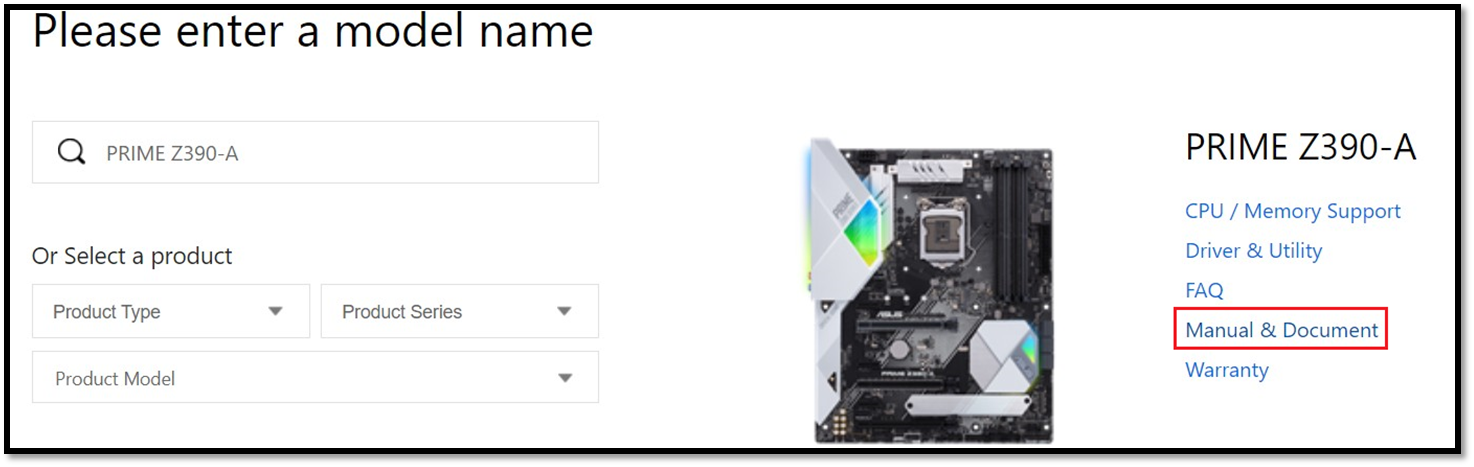
Step 2: Search for the model in the search box, and click on the found model.
Step 3: Click on Manuals & Documents.
Step 4: Click Download and download the required manual file.
